Builder gel lifting is one of the most frustrating problems beginners face.
You spend time shaping, curing, and perfecting your nails — and within days, the edges start lifting, peeling, or cracking.
The good news?
Builder gel lifting is completely preventable when you understand:
- What causes lifting
- Proper nail prep
- Correct apex structure
- Application thickness
- Curing mistakes
- Aftercare habits
This complete guide will teach you exactly how to stop builder gel lifting and make your manicure last 3+ weeks, including tips on how to use builder gel effectively.
If you’re new to the basics of builder gel, start with our step-by-step tutorial here:
👉 How to Apply Builder Gel – Step-by-Step Beginner Tutorial
https://whatisbuildergel.com/how-to-apply-builder-gel/
Now let’s fix the lifting issue for good.
What Is Builder Gel and Why Does It Lift?Before fixing lifting, you need to understand the product itself.
What Is Builder Gel?
Builder gel is a thick, self-leveling gel used to:
- Strengthen natural nails
- Add structure
- Create an apex
- Extend nail length
- Protect weak or brittle nails
If you’re still wondering what is builder gel for nails, it is essentially a structural gel enhancement that cures under UV or LED light and lasts 2–4 weeks when applied correctly.
Unlike gel polish, builder gel adds thickness and architecture.
So why does it lift?
Because builder gel must bond directly to a properly prepared nail plate. If anything interferes with adhesion, lifting begins.
Top 10 Causes of Builder Gel Lifting
Most lifting happens due to application errors — not product quality.
Let’s break them down.
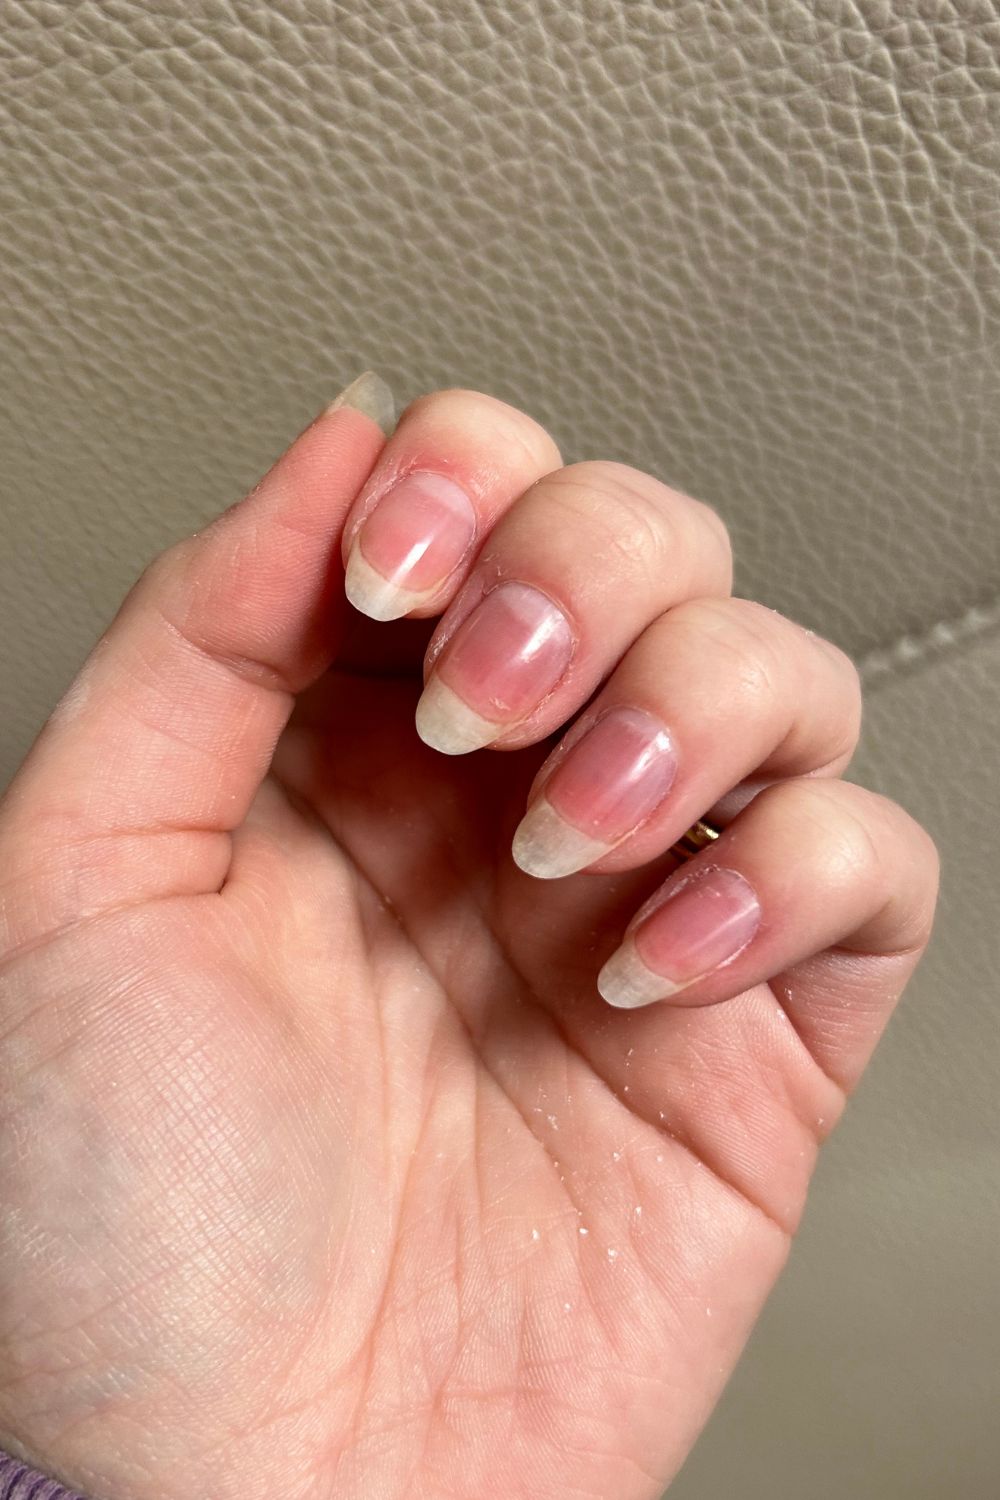
1. Poor Nail Prep (The #1 Cause)If there is any oil, cuticle, or shine left on the nail, builder gel cannot bond properly.
Common prep mistakes:
- Not pushing cuticles back fully
- Leaving invisible cuticle on nail plate
- Skipping dehydration
- Not buffing the surface
- Touching nails after prep
Even tiny traces of oil cause lifting.
Proper Nail Prep vs Poor Prep


2. Gel Touching the Cuticles
If builder gel touches skin, it will lift.
Why?
Gel adheres to the nail — not skin. When it bonds to skin and the skin moves or sheds, the gel detaches.
This creates lifting pockets.
Solution:
- Leave a tiny margin around cuticle
- Use a detail brush if needed
- Clean edges before curing
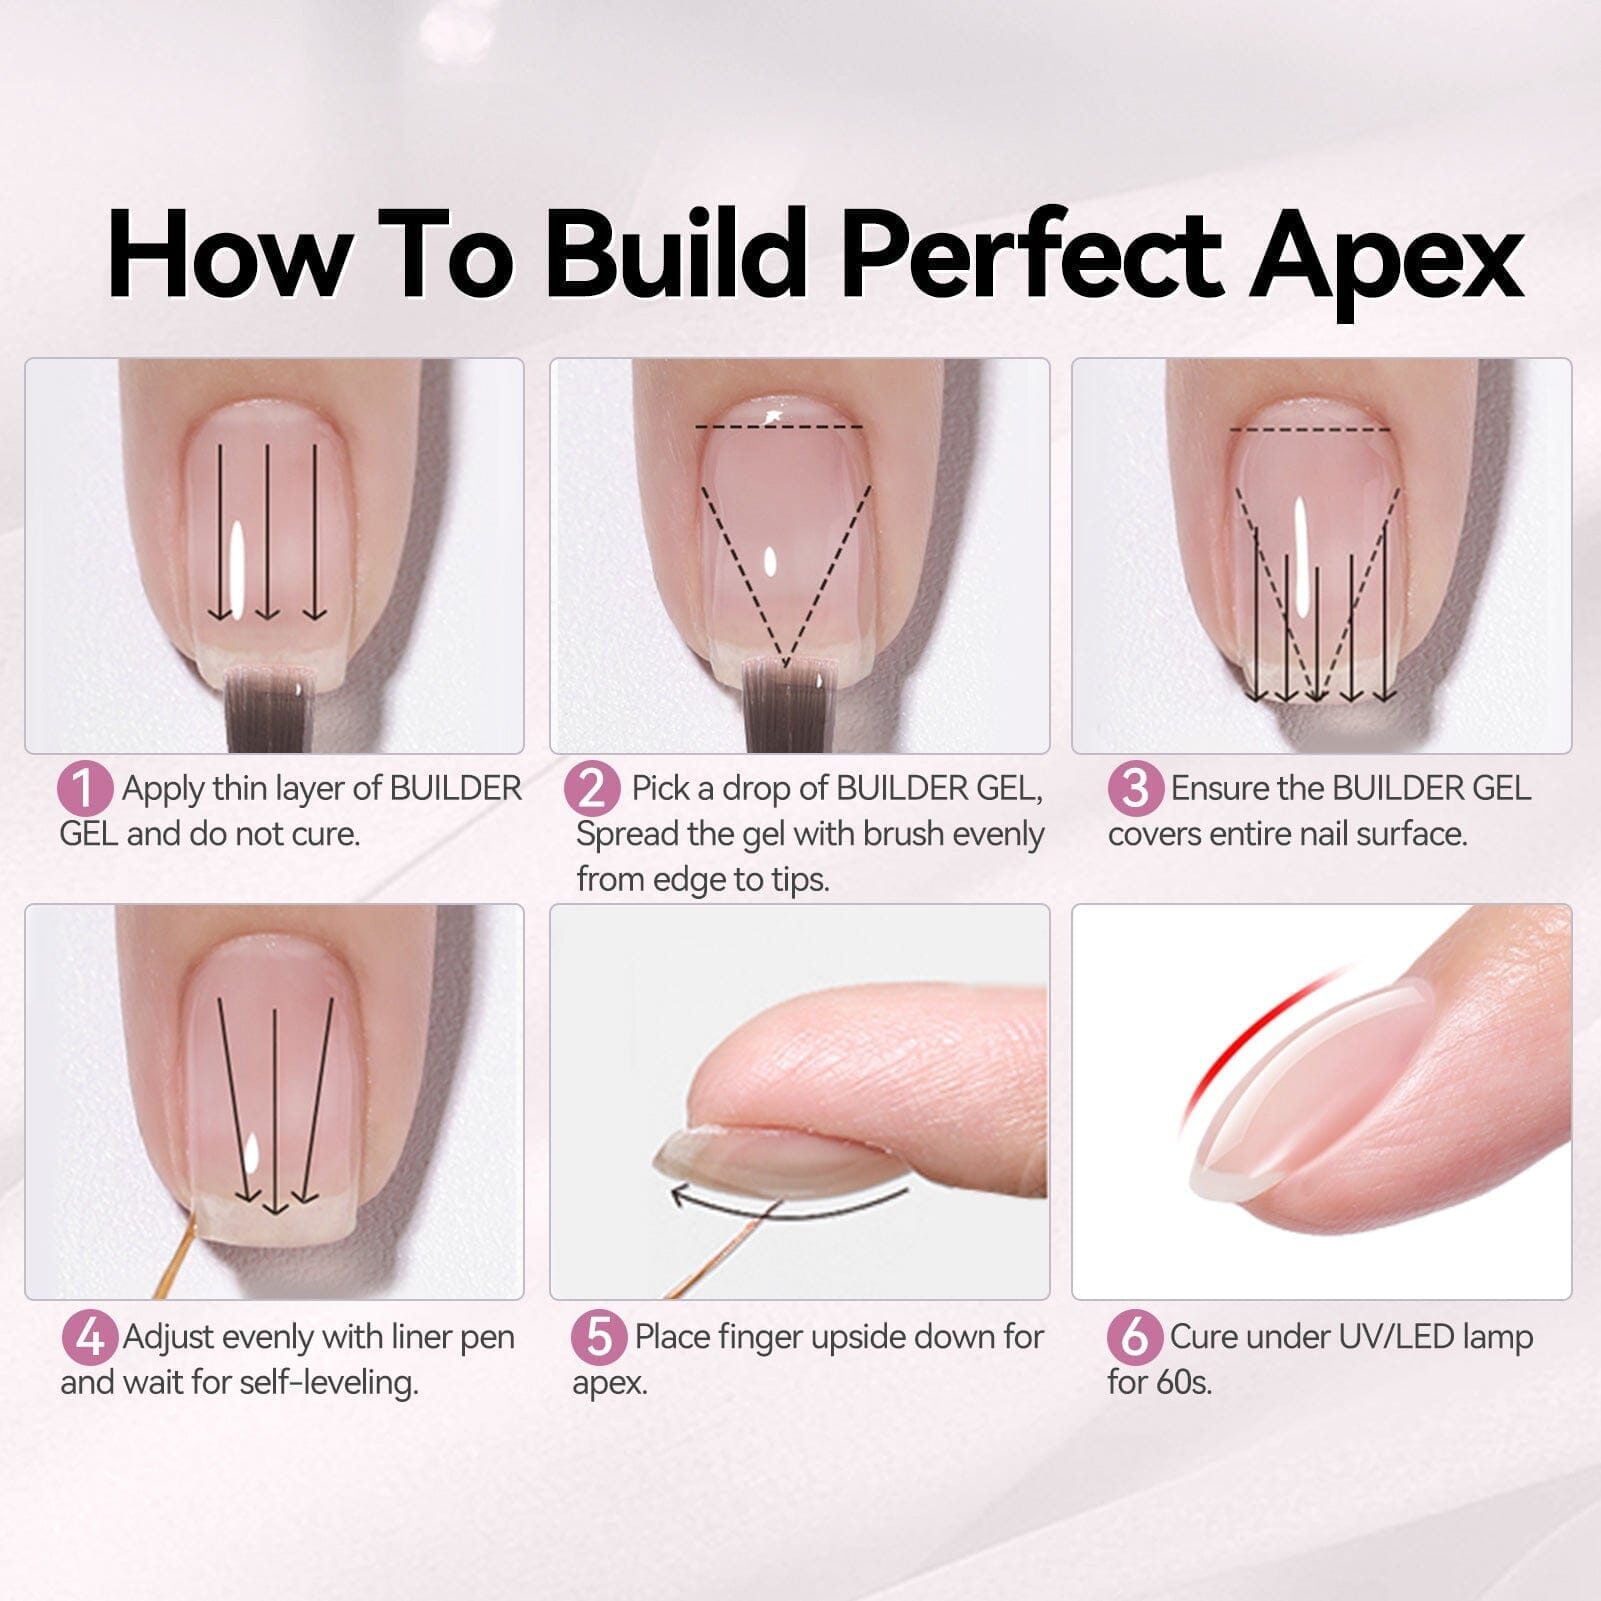
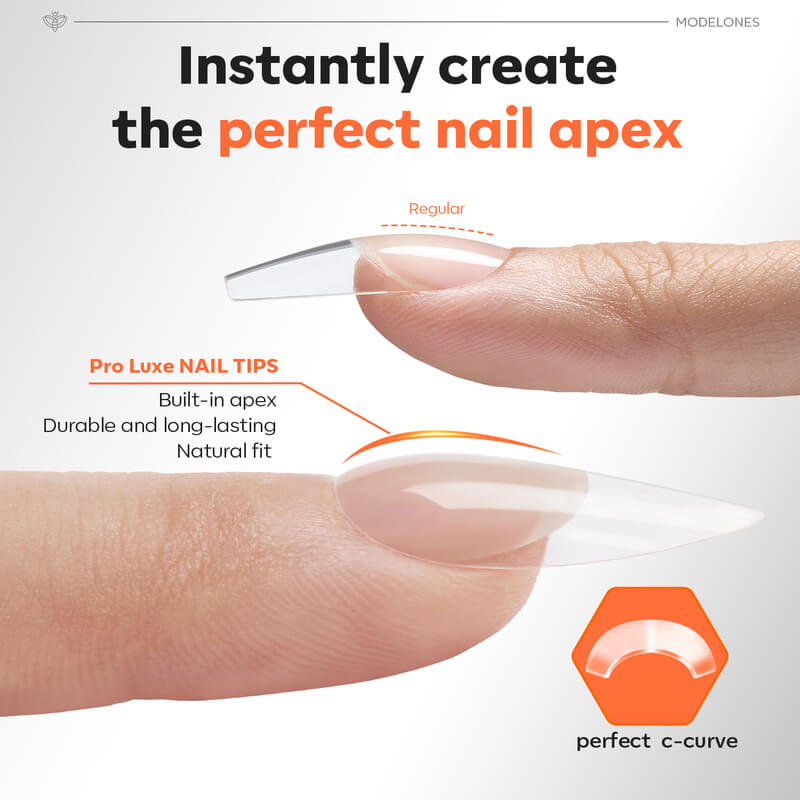
3. Not Building a Proper Apex
The apex gives strength.
Without it:
- Nails bend
- Pressure causes cracks
- Edges lift
Short nails still need structure — just smaller.
If you’re unsure how to build structure correctly, review the apex technique inside our full guide:
👉 https://whatisbuildergel.com/how-to-apply-builder-gel/
Understanding how to use builder gel properly means mastering apex placement.
Apex Structure
4. Applying Gel Too Thick
Thick layers do not cure evenly.
What happens:
- Top cures
- Middle stays soft
- Product shrinks
- Edges separate
Always apply in controlled layers.
5. Under-Curing the Gel
Improper curing is a silent lifting cause.
Common issues:
- Weak lamp
- Old bulbs
- Hand not centered
- Removing too early
LED: 60–90 seconds
UV: 2 minutes (or per brand instructions)
Never guess curing time.
6. Skipping Primer or Dehydrator
Natural nails contain oils.
Dehydrator removes moisture.
Primer increases adhesion.
If you skip them, lifting risk doubles.
7. Over-Filing the Nail Plate
Too much filing weakens the nail.
Weak nails flex.
Flexing breaks adhesion.
Buff gently — do not thin the nail.
8. Water Exposure After Application
Water expands the nail plate.
If exposed immediately after application:
- Bond weakens
- Lifting starts at free edge
Avoid water for 1–2 hours after curing.
9. Using Nails as Tools
Opening cans. Scraping labels. Peeling stickers.
Builder gel is strong — but not indestructible.
Mechanical stress leads to edge lifting.
10. Incorrect Removal Process
If builder gel was removed improperly before reapplication, the nail surface may be damaged.
This affects adhesion next time.
If you’re unsure how to remove builder gel, we’ll cover that later in this guide.
Step-by-Step: How to Stop Builder Gel Lifting
Now let’s fix the problem permanently.
Step 1: Perfect Your Nail Prep Routine
Follow this checklist every time:
✔ Remove old product fully
✔ Push back cuticles
✔ Remove cuticle growth
✔ Buff surface shine
✔ Clean with alcohol
✔ Apply dehydrator
✔ Apply primer
Do not touch nails after prep.
Step 2: Apply a Thin Slip Layer
A thin base layer improves adhesion.
- Keep it thin
- Avoid cuticles
- Do not flood sidewalls
Then build structure.
Step 3: Build the Apex Properly
The highest point should be:
- Slightly above center for short nails
- 1/3 from cuticle for longer nails
Flip hand upside down 5–10 seconds to self-level.
Step 4: Cure Completely
Invest in a quality lamp.
Replace bulbs regularly.
Cure each layer fully.
Proper Curing Position


Step 5: Seal the Free Edge
Capping the free edge prevents lifting at tips.
Always brush product across the edge lightly.
Step 6: Finish with High-Quality Top Coat
Top coat seals structure and prevents chipping.
Cure fully.
Apply cuticle oil after.
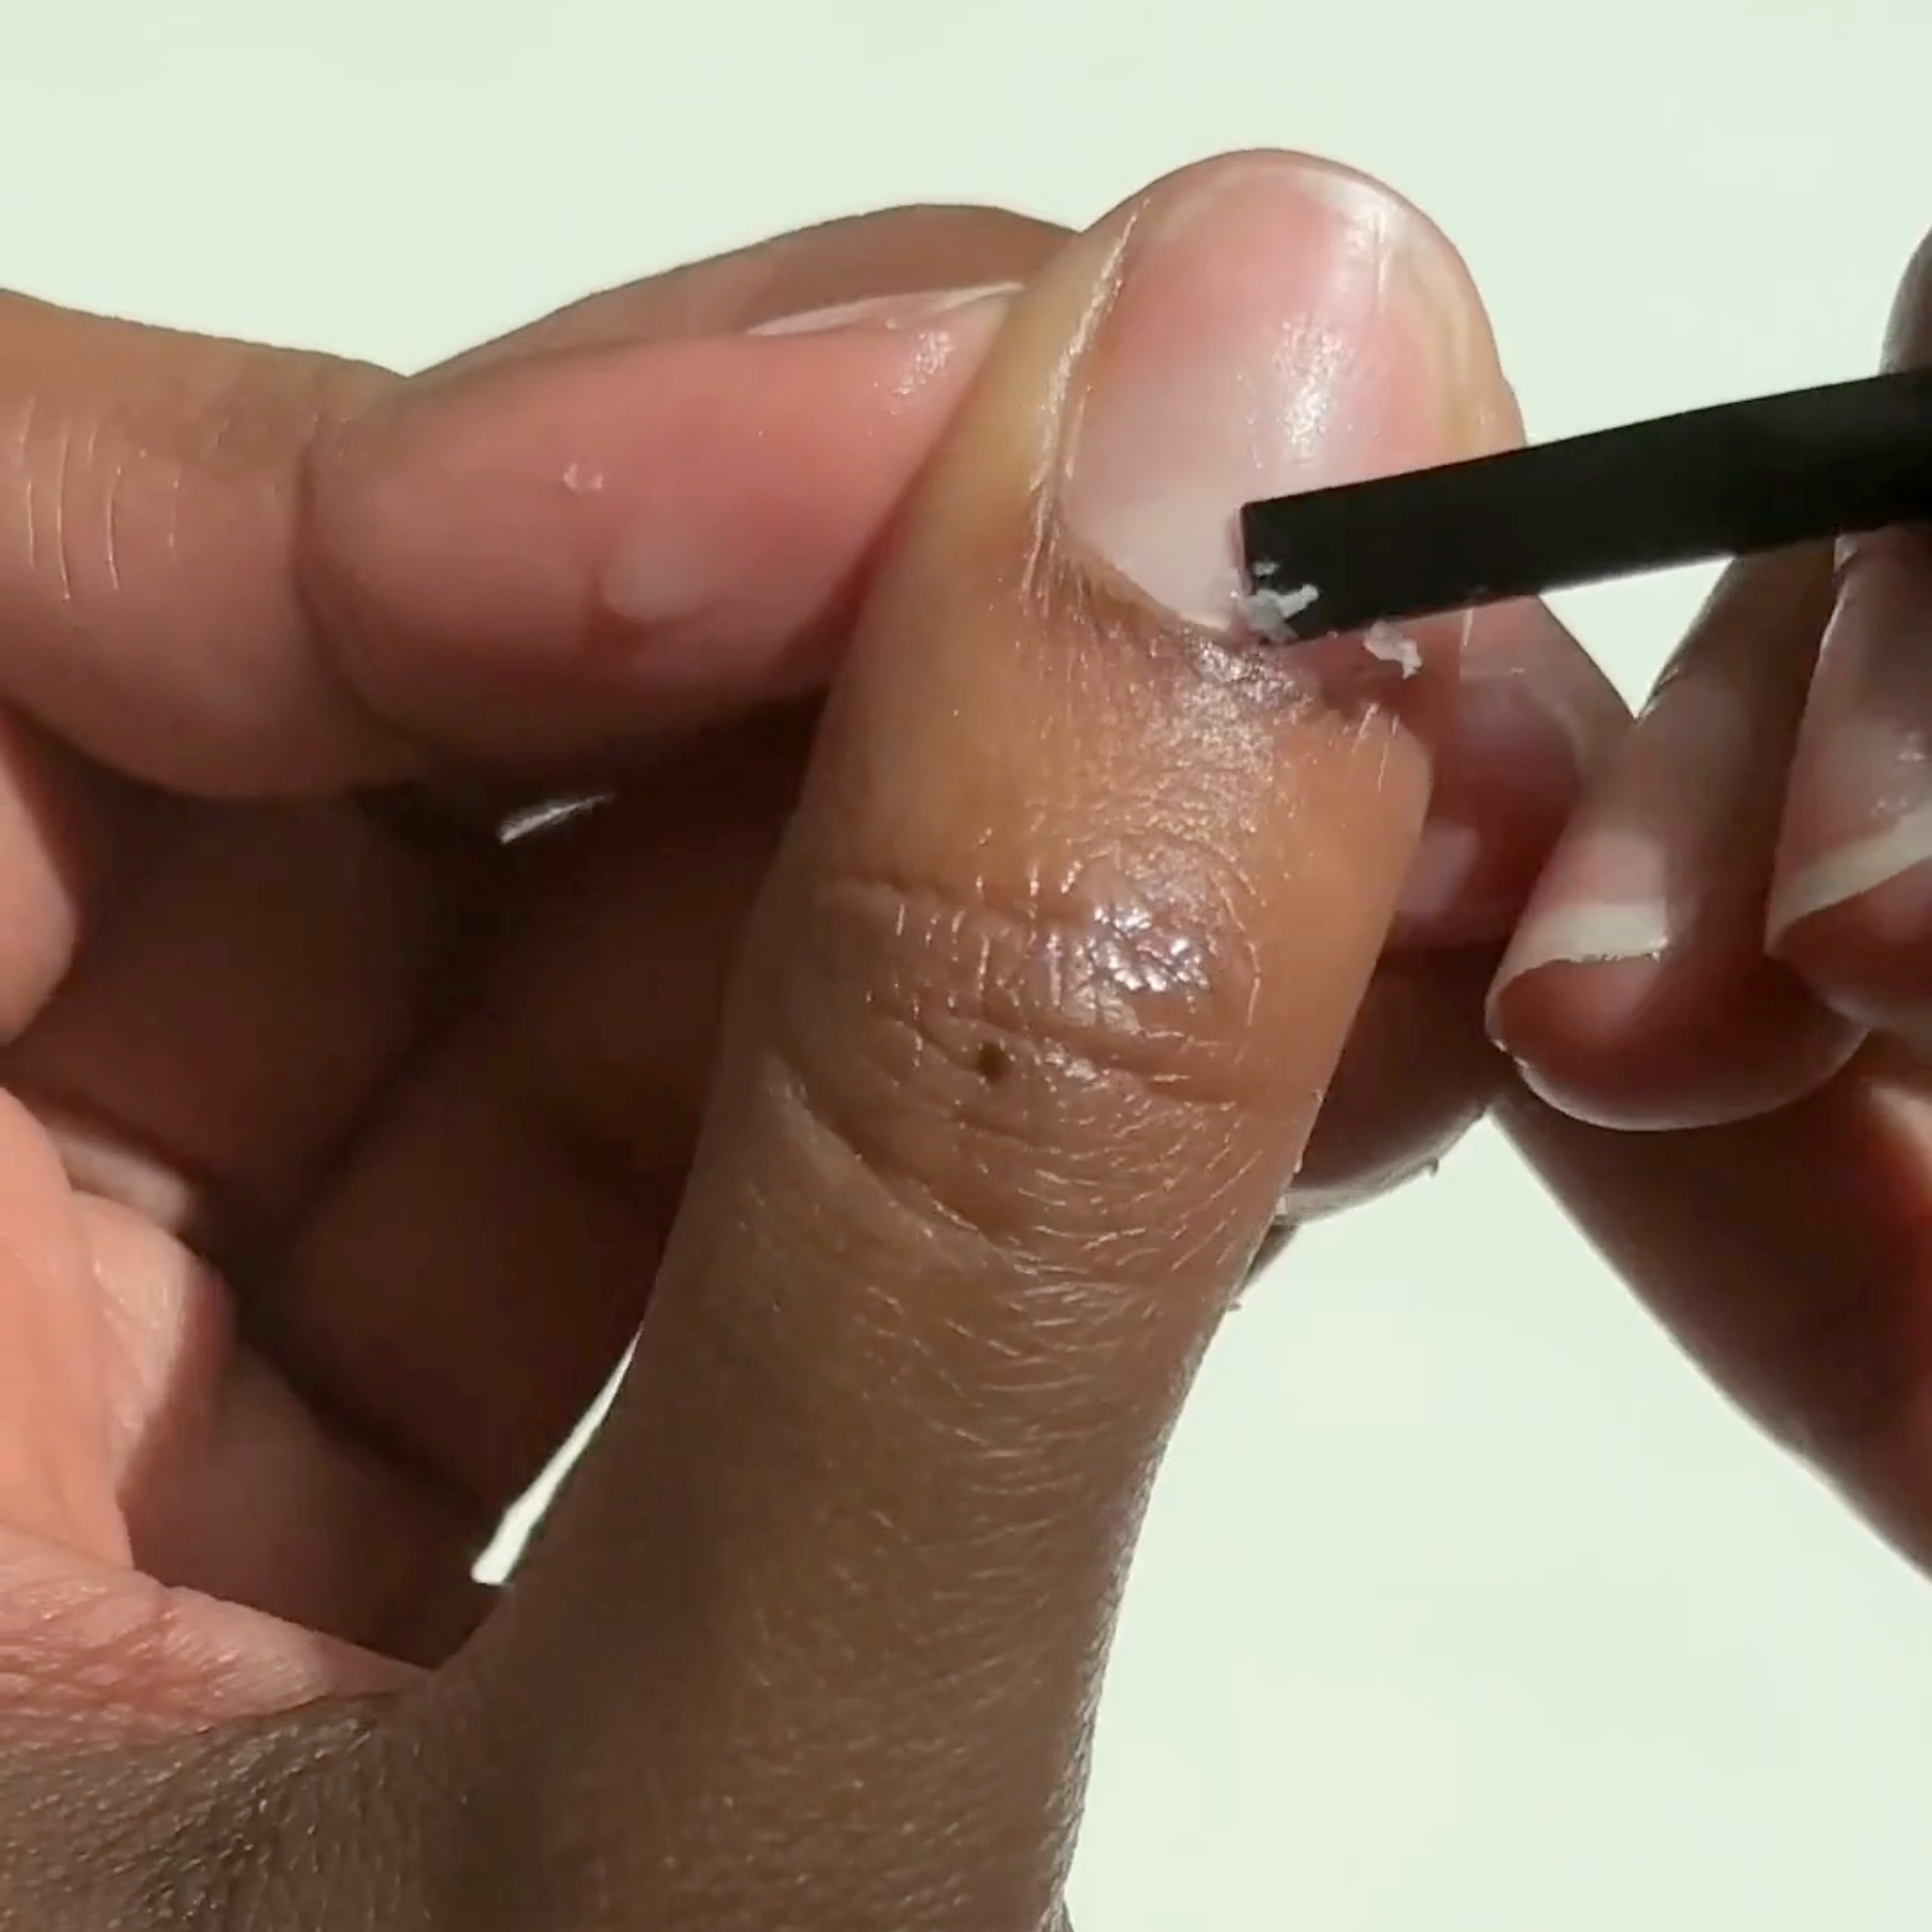
How to Fix Lifting If It Already Started
Small lifting area?
Do NOT glue it down.
Instead:
- File off lifted area
- Smooth surface
- Reapply thin builder gel layer
- Cure properly
Large lifting?
Remove fully and reapply.
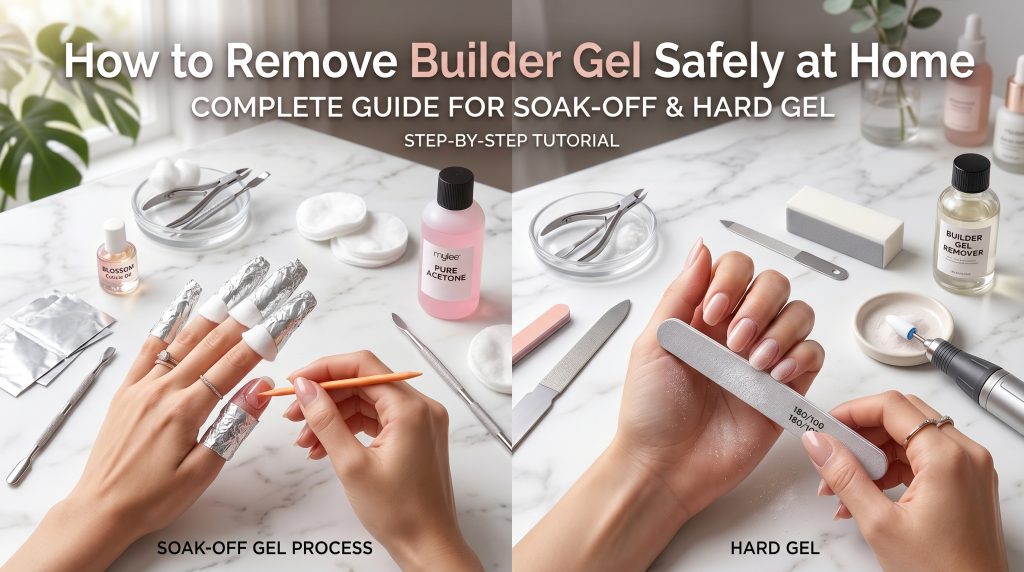
How to Remove Builder Gel Safely
Understanding how to remove builder gel is critical to preventing future lifting.
Improper removal damages nail plate and weakens adhesion next time.
Removal Options:
Soak-Off Builder Gel:
- File top coat
- Soak in acetone 10–15 minutes
- Gently push off
Hard Builder Gel:
- File down carefully
- Do not rip off
- Leave thin layer to protect nail
Never peel builder gel off.
Safe Removal Process


How Long Should Builder Gel Last?
When applied correctly:
- 2–3 weeks on short nails
- 3–4 weeks with proper apex
- Minimal lifting
If lifting happens in 3–5 days, something in prep or curing needs adjustment.
Builder Gel vs Acrylic: Lifting Differences
Builder gel:
- Flexible
- Less cracking
- Lifts from edges if prep poor
Acrylic:
- Rigid
- Can snap instead of lift
- Strong odor during application
For beginners learning what is builder gel, it’s generally easier and more forgiving than acrylic — but prep precision matters more.
Pro Tips to Prevent Lifting Long-Term
- Use cuticle oil daily (after 24 hours)
- Avoid acetone exposure
- Wear gloves while cleaning
- Schedule fills at 2–3 weeks
- Keep nails at manageable length
- Invest in quality products
Consistency beats quick fixes.
Final Thoughts: Stop Builder Gel Lifting for Good
Builder gel lifting is not random.
It happens because of:
- Poor prep
- Cuticle contamination
- No apex
- Under-curing
- Mechanical stress
- Improper removal
Once you master:
- Nail prep
- Structure
- Curing
- Aftercare
Your builder gel nails can last weeks without peeling.
If you still need help with application technique, review the complete beginner tutorial here:
👉 https://whatisbuildergel.com/how-to-apply-builder-gel/
Master the basics first — then perfect durability.

Skilled content writer with more than five years of experience.