Introduction
You know that feeling when you want gorgeous, long-lasting nails but can’t decide between acrylic and gel? Acrylics are strong but can smell strong and damage nails. Gel is gentle but not as durable for extensions. There has to be something in between, right?
Enter polygel nails—the hybrid hero we didn’t know we needed. I still remember my first attempt with polygel nails design. I’d watched about 47 tutorials, bought a starter kit, and sat at my kitchen table feeling like a mad scientist mixing this magical “putty” that was somehow both firm and moldable. The result? Not perfect, but surprisingly good for a first try!
Here’s the thing about polygel: it combines the best of both worlds. It’s stronger than gel, more flexible than acrylic, and way less messy than either. Whether you’re searching for polygel tutorial guidance, wondering about how long do polygel nails last, or curious how it compares to traditional acrylic powder, this guide has everything you need.
rom basic how to apply polygel nails at home techniques to stunning DIY polygel design ideas, let’s dive into the world of polygel and transform your nail game! 💅
What Is Polygel? The Best of Both Worlds
Before we dive into polygel nails design, let’s understand what makes this product so special.
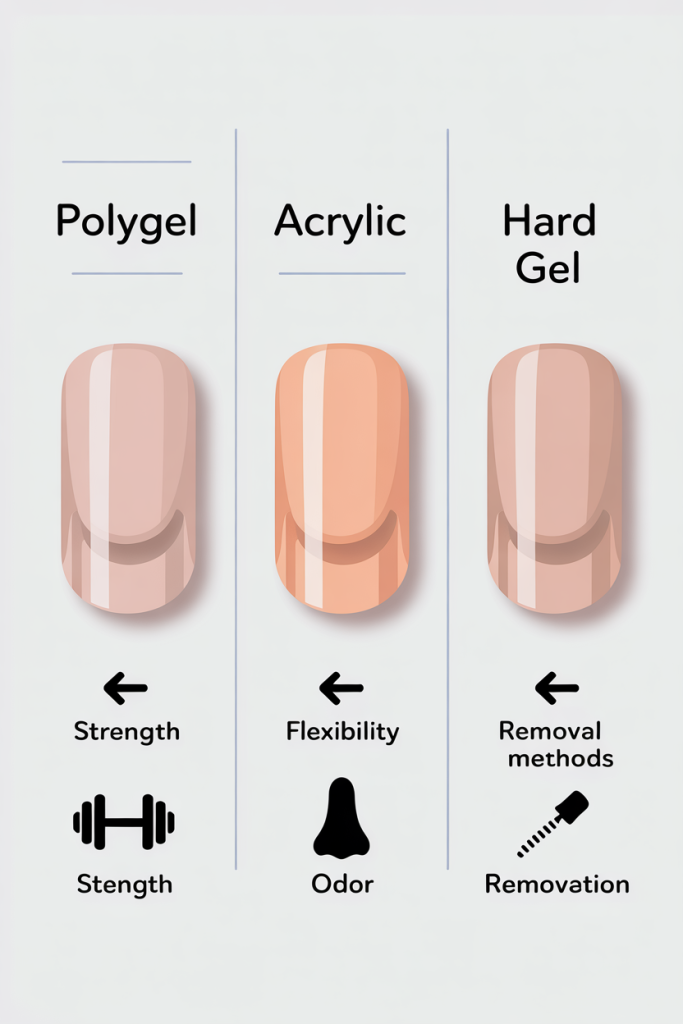
Polygel is a hybrid nail enhancement that combines the best properties of acrylic and hard gel:
| Feature | Polygel | Acrylic | Hard Gel |
|---|---|---|---|
| Consistency | Putty-like, moldable | Liquid + powder | Viscous gel |
| Drying method | UV/LED lamp | Air dry | UV/LED lamp |
| Flexibility | Medium | Low (brittle) | High |
| Strength | High | Very high | Medium-high |
| Odor | Low to none | Strong | Low |
| Ease of removal | Soak-off | Filing required | Soak-off |
Why polygel is taking over in 2025:
- 📈 Searches for polygel nails have increased 150% year over year
- 💪 Lightweight but incredibly strong
- 🎨 Won’t run or drip during application
- 🌿 Often odorless and gentler than acrylics
- ⏱️ Cures quickly under LED lamp
Celebrity nail artist Maria Gonzalez notes: “Polygel has revolutionized home nail kits. It’s forgiving enough for beginners but versatile enough for pros. I honestly recommend it to 80% of my DIY clients.”
Polygel Nails vs. Acrylic Powder: What’s the Difference?
Many people search for acrylic powder when they really want polygel—let’s clear up the confusion!

Acrylic Powder (Traditional)
- Pros: Extremely strong, familiar to nail techs, affordable
- Cons: Strong odor, runny application, hard on natural nails
Polygel (The New Favorite)
- Pros: Lightweight, flexible, odorless, easier to control
- Cons: Requires UV lamp, slightly higher initial cost
The bottom line: If you’re doing DIY polygel at home, polygel is almost always the better choice. It’s more forgiving, less messy, and gentler on your natural nails.
Internal Link: Check out our comparison of builder gel vs. acrylic for more details.
How Long Do Polygel Nails Last? (Real Talk)
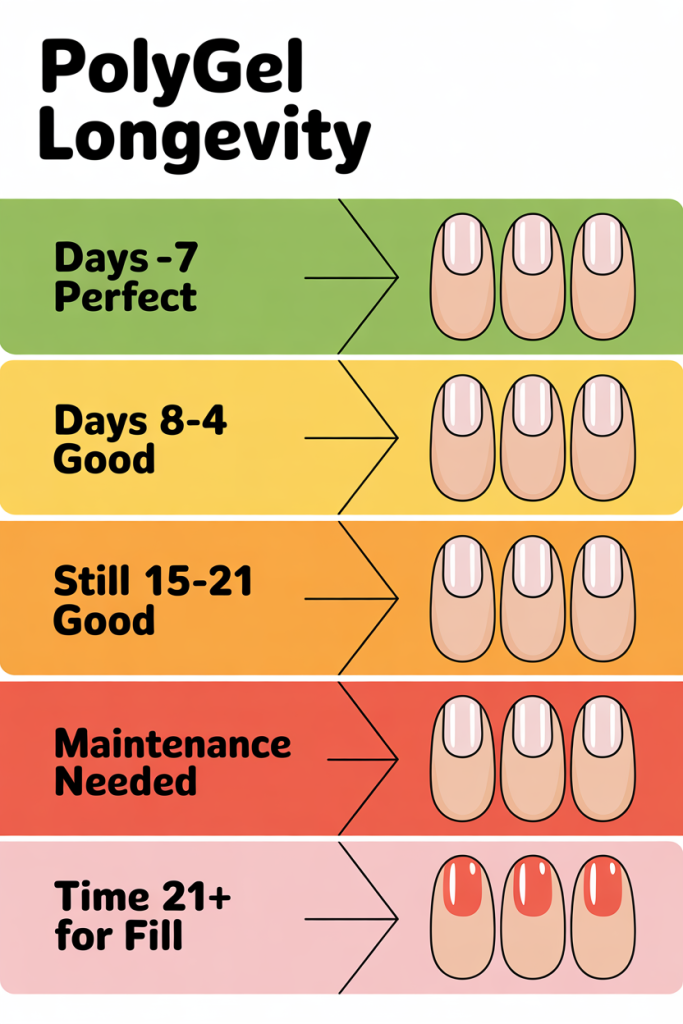
One of the most common questions I get: how long do polygel nails last?
The honest answer: With proper application, 2-4 weeks!
Factors that affect longevity:
- ✅ Nail prep: The #1 factor! Oily nails = lifting
- ✅ Application technique: Thin layers, proper curing
- ✅ Aftercare: Gloves for cleaning, no prying
- ✅ Your natural nails: Oily nail beds lift faster
- ✅ Brand quality: Better products = better wear
Pro tip: Most lifting happens in the first 48 hours. If they survive that window, you’re golden for 2-3 weeks!
How to Apply Polygel Nails at Home: Step-by-Step
Ready to learn how to apply polygel nails at home? Follow these steps carefully!
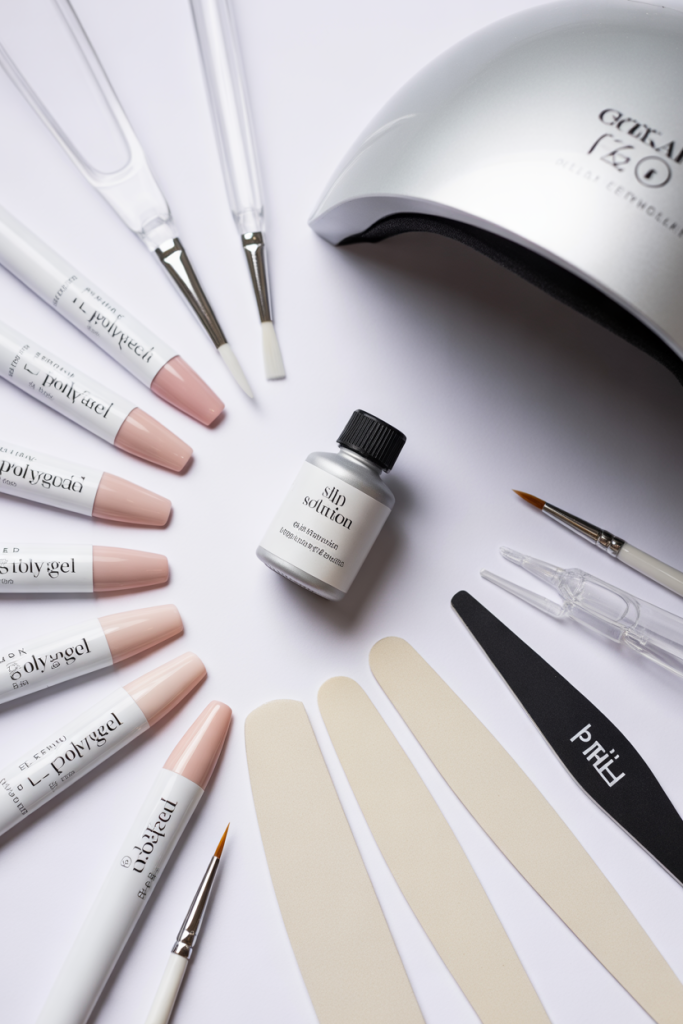
What You’ll Need:
Essential supplies:
- Polygel in your chosen color(s)
- UV/LED lamp (at least 48W recommended)
- Nail forms or tips
- Polygel brush and slip solution (99% alcohol)
- Nail file and buffer (100/180 grit)
- Nail dehydrator and primer
- Cuticle pusher
- Lint-free wipes
Nice to have:
- Polygel dual forms (easier for beginners!)
- Nail cleanser
- Cuticle oil
Step 1: Prep Your Natural Nails
This is the MOST important step for how long do polygel nails last.
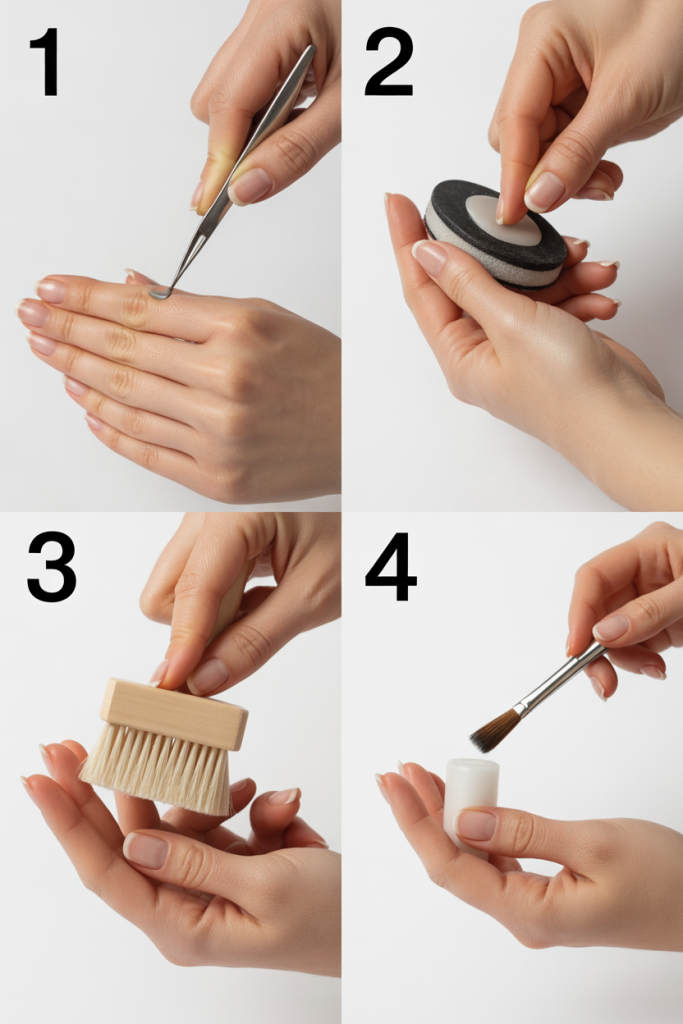
- Push back cuticles gently
- Gently buff nail surface to remove shine
- Shape natural nails if keeping short
- Brush away all dust
- Apply dehydrator to remove oils
- Apply primer (wait for it to dry)
Pro tip: After dehydrator, don’t touch your nails! Oils from your fingers will undo all your hard work.
Step 2: Choose Your Application Method
Two ways to apply polygel:
Method A: Dual Forms (Easiest for Beginners)
- Apply slip solution to the form
- Squeeze polygel into the form
- Press onto your nail at an angle
- Cure under lamp
- Gently remove form
- Shape and file
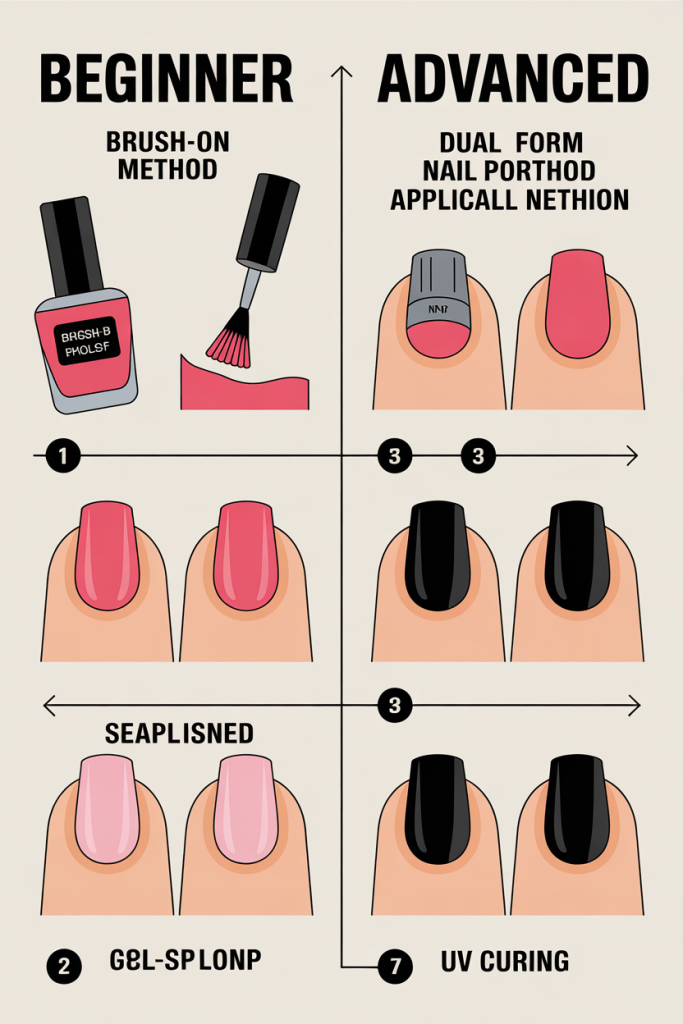
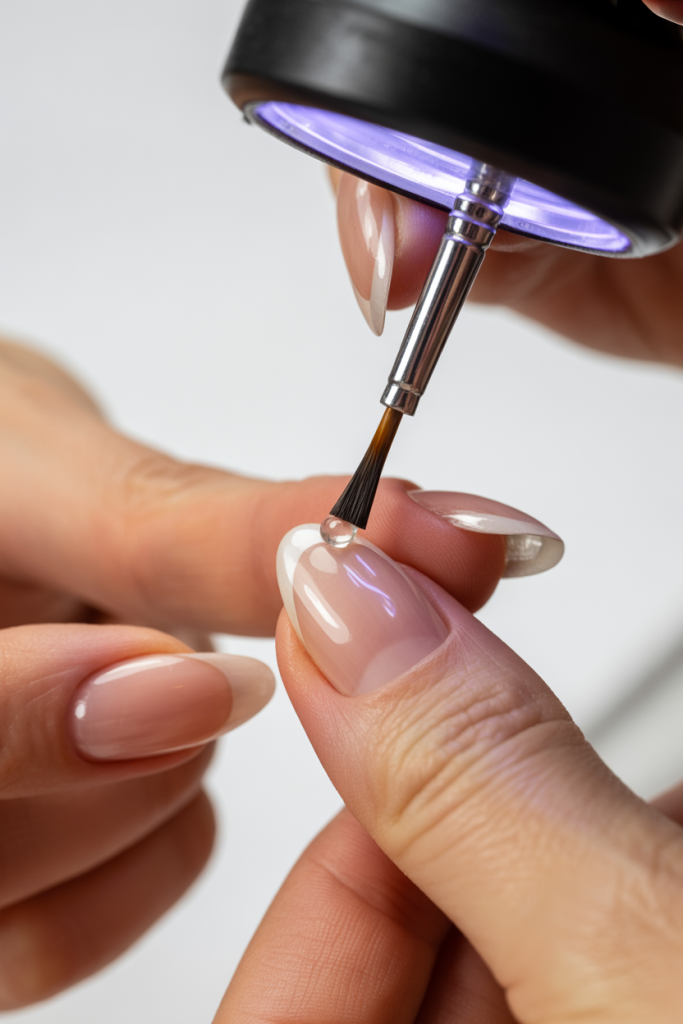
Method B: Brush-on (More Control)
- Apply slip solution to brush
- Pick up a polygel bead
- Place at cuticle area
- Pat and shape with brush
- Cure, then add more layers
- File and shape
For beginners: Start with dual forms! They’re way more forgiving.
Step 3: Apply Polygel
For dual forms:
- Squeeze a small amount of polygel into the form (don’t overfill!)
- Use brush with slip solution to spread evenly
- Press onto nail at 45-degree angle, then flatten
- Hold for a few seconds, wipe away excess
- Cure under lamp (30-60 seconds depending on lamp)
- Gently twist form to remove
- Repeat for all nails
For brush method:
- Dip brush in slip solution
- Pick up a bead of polygel
- Place at cuticle area (not touching skin!)
- Gently pat and push toward tip
- Shape with brush, adding slip as needed
- Cure, then add more layers for length
Common mistake: Too much polygel! Less is more—you can always add, but removing is hard.
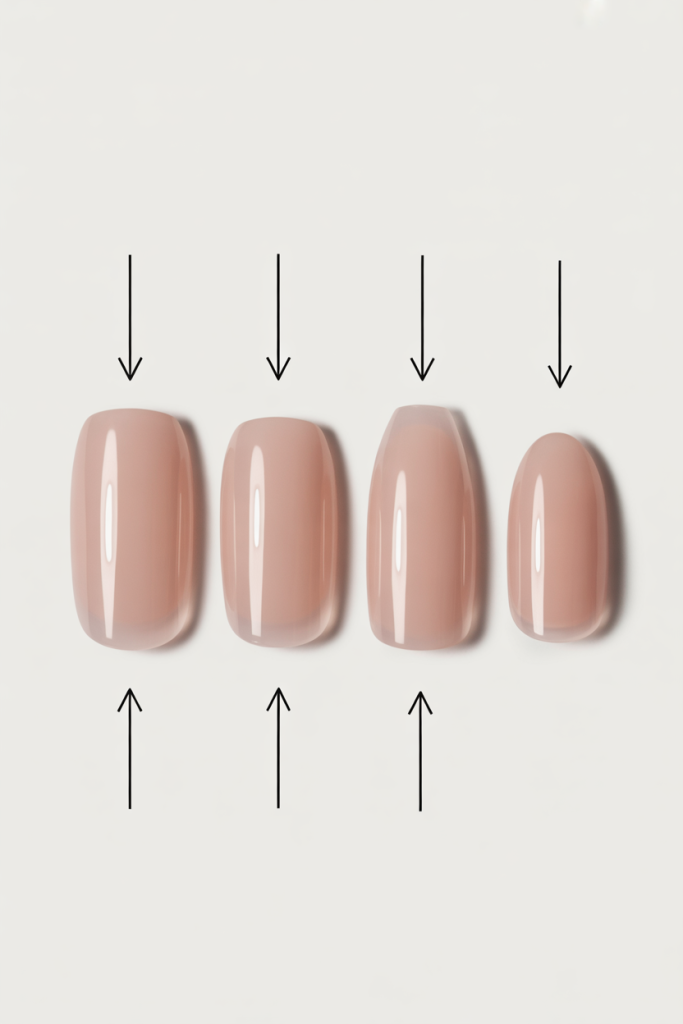
Step 4: Shape Your Polygel Nails
Once all nails are cured, it’s shaping time!
Basic shapes:
- Square: File straight across, slightly soften corners
- Almond: File sides inward, round the tip
- Coffin: File sides straight, flat tip
- Round: Follow natural fingertip curve
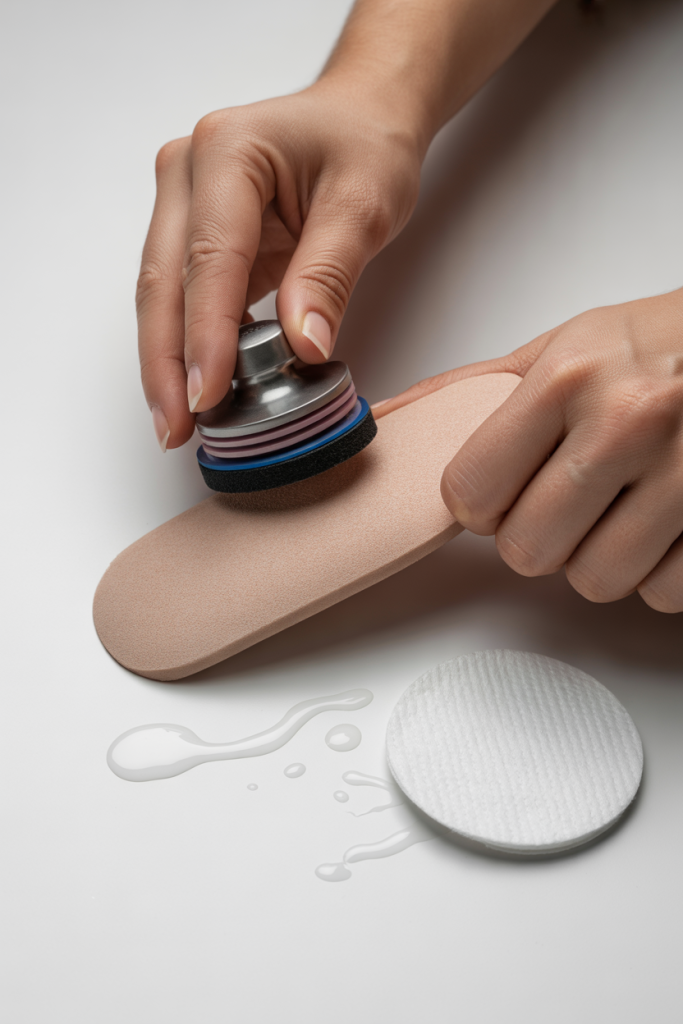
Filing technique:
- Use coarse file (100 grit) for bulk shaping
- Shape from underneath first
- File sides evenly
- Refine with finer file (180 grit)
- Buff surface for smoothness
Pro tip: File in one direction only—sawing back and forth weakens the polygel.
Step 5: Perfect Your Surface
A smooth surface is essential for beautiful polygel nails design.
- Check for lumps or uneven areas
- File gently to smooth
- Buff entire surface to remove file marks
- Wipe with alcohol to remove dust
- Apply top coat and cure
Polygel Nails Design: 15 Stunning Ideas to Try
Now for the fun part—polygel nails design ideas that show off this versatile product!
Classic & Elegant
1. French Perfection
Classic white tips on sheer pink polygel. Timeless and elegant, and polygel makes the tips extra strong.
2. Sheer Nude Gloss
Barely-there nude polygel with high-shine top coat. The ultimate “my nails but better” look.
3. Milky White Dreams
Semi-sheer white polygel that looks like milky glass. Fresh and modern.
4. Rose Gold Shimmer
Polygel with fine rose gold shimmer mixed in. Romantic and warm.
5. Glossy Red Statement
Bold red polygel with ultra-high shine. Classic with a modern twist.
Modern & Trendy
6. Ombre Perfection
Gradient from sheer to pink or white using polygel. Seamless and sophisticated.
7. Glazed Donut Effect
Soft, shimmering finish made famous by Hailey Bieber—polygel creates it perfectly.
8. Tortoiseshell Swirls
Warm amber and brown swirls in clear polygel. Surprisingly trendy!
9. Color Block
Bold geometric sections in contrasting colors. Polygel’s structure holds sharp lines beautifully.
10. Negative Space
Strategic bare spots created with polygel forms. Modern and edgy.
Artistic & Fun
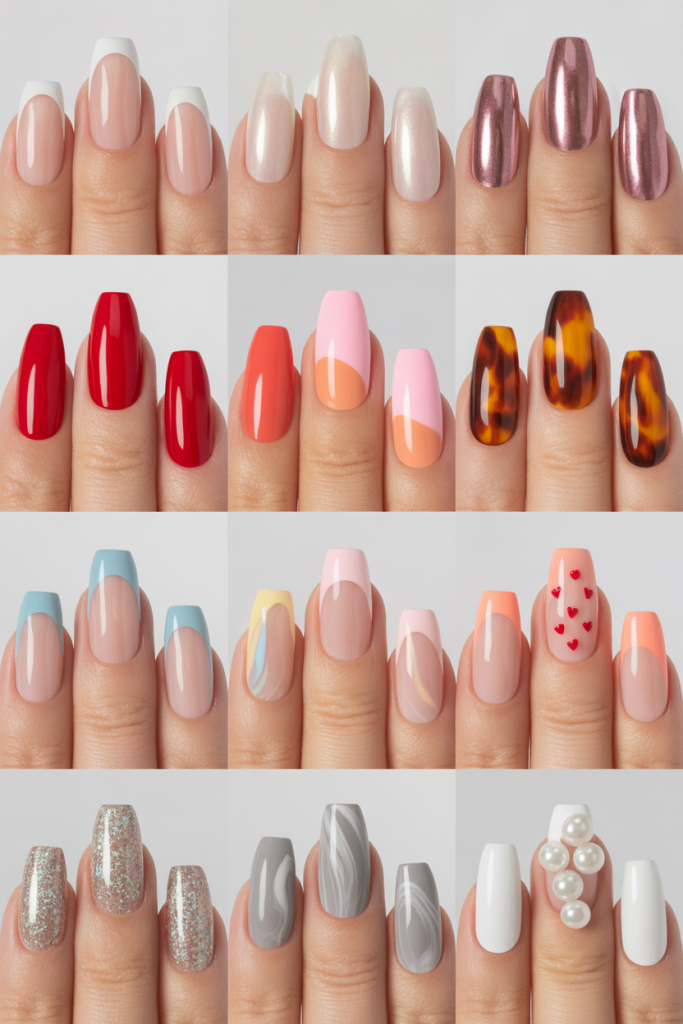
11. Floral Accents
Tiny flowers painted on polygel nails. The smooth surface is perfect for detail work.
12. Heart Details
Tiny hearts on accent nails. Romantic and sweet.
13. Glitter Gradient
Glitter fading from cuticle to tip. Polygel’s thickness allows for dimensional glitter.
14. Marble Effect
Swirled marble patterns in white and gray. Elegant and artistic.
15. 3D Accents
Tiny sculpted details using clear polygel. Dimensional and eye-catching.
DIY Polygel: Common Mistakes and How to Avoid Them
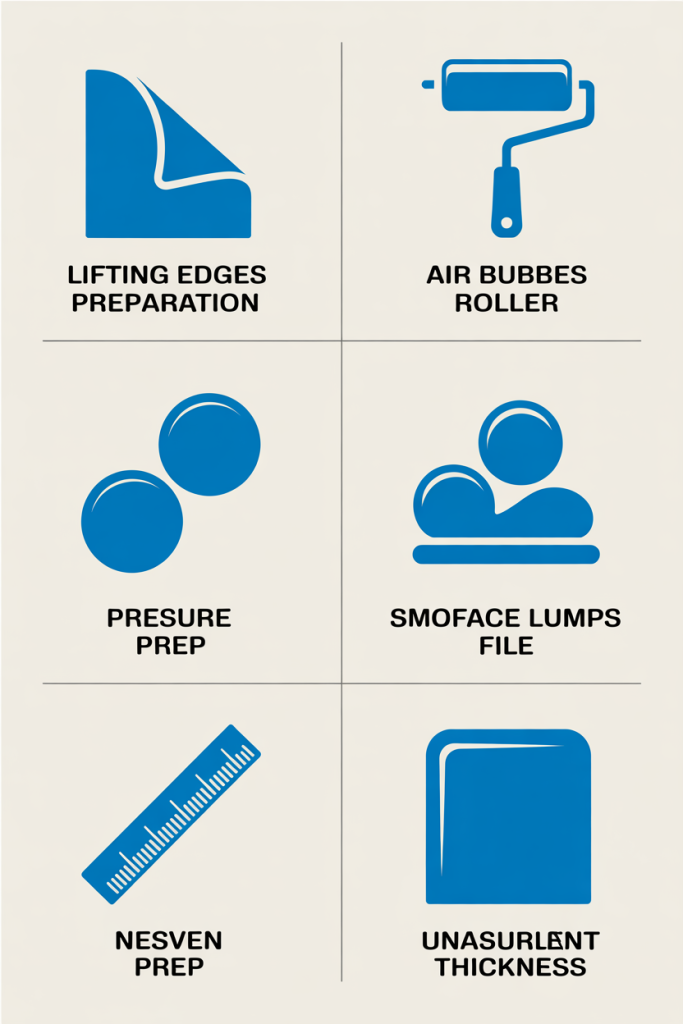
Learning DIY polygel comes with a learning curve. Here’s how to avoid the most common issues:
| Mistake | Why It Happens | How to Fix |
|---|---|---|
| Lifting within days | Poor prep, oils left on nail | Scrub cuticles, use dehydrator, don’t touch nail plate |
| Bubbles in polygel | Trapped air from pressing | Apply slowly, use less pressure |
| Lumpy surface | Uneven application, not filing enough | Practice bead placement, file thoroughly |
| Nails too thick | Too much product | Use smaller amounts, file more |
| Product on skin | Bead too large, poor placement | Use smaller beads, keep away from skin |
| Not curing | Lamp too weak, layer too thick | Check lamp wattage, use thin layers |
| Forms won’t stick | Not enough pressure, wet slip | Press firmly, don’t oversaturate with slip |
The “Polygel Is Too Hard for Beginners” Myth
The myth: Polygel nails are too difficult for beginners—stick to tips or press-ons.
The truth: Polygel is actually MORE forgiving than acrylics for beginners!
Why polygel wins for beginners:
- ✅ No runny liquid to control
- ✅ Won’t dry out while you work
- ✅ Dual forms provide built-in shape
- ✅ Can wipe off and restart easily before curing
- ✅ Less damage if you make mistakes
Think of polygel like playing with modeling clay versus trying to paint with runny paint. Which sounds easier to control?
How Long Do Polygel Nails Last? Maintenance Tips
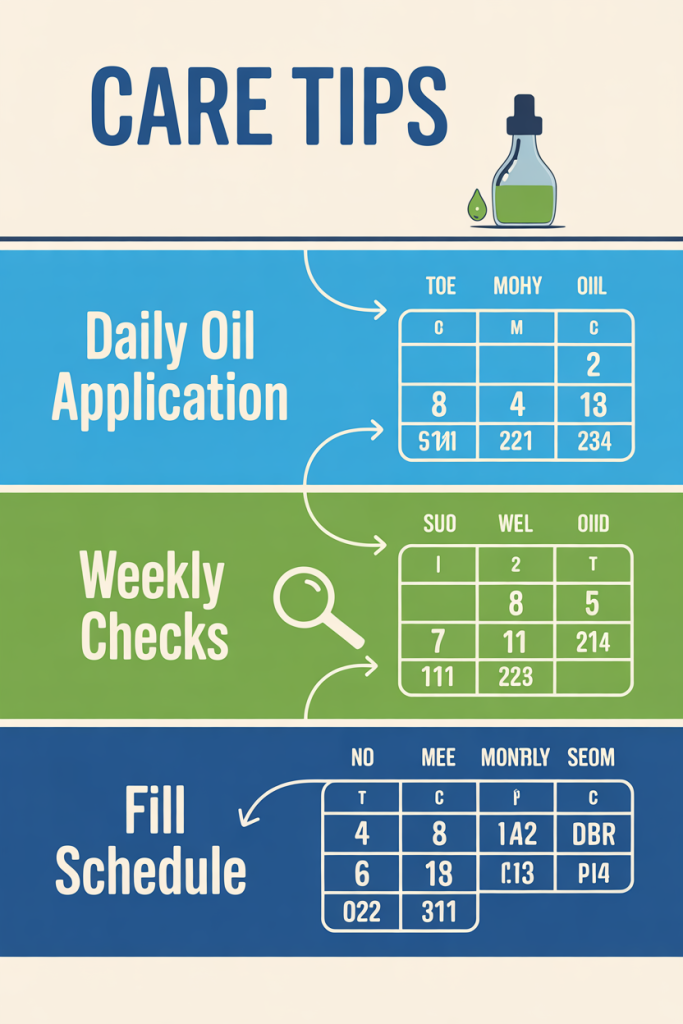
We covered how long do polygel nails last earlier, but here’s how to MAXIMIZE that time:
Daily Care:
- 💧 Apply cuticle oil daily (keeps polygel flexible)
- 🧤 Wear gloves for dishes/cleaning
- ✨ Avoid using nails as tools
Weekly Check:
- 🔍 Check for lifting at edges
- 💅 File any rough spots
- ✨ Refresh top coat if needed
Fill Timeline:
- 2 weeks: Quick fill if you have fast growth
- 3 weeks: Standard fill time
- 4 weeks: Maximum before full removal recommended
Pro tip: Most lifting happens from the cuticle area. Keep that area extra clean and oil-free during application!
DIY Polygel: Product Recommendations for Beginners
Best Starter Polygel Kits:
| Kit | Price Range | Best For | Includes |
|---|---|---|---|
| Modelones Polygel Kit | $30-40 | Complete beginners | Polygel, lamp, forms, brush, slip, files |
| Beetles Polygel Set | $35-45 | Color variety | 6 polygel colors, tools, forms |
| Makartt Pro Kit | $40-50 | Quality focus | Professional-grade products, stronger lamp |
| Gellen Starter Set | $25-35 | Budget option | Basic kit, good for testing |
Must-Have Individual Items:
- Polygel brush: Kolinsky or silicone (silicone is easier!)
- Slip solution: 99% alcohol works, but branded slip is better
- Lamp: At least 48W, LED is faster than UV
- Forms: Dual forms for beginners, paper forms for advanced
- Files: 100/180 grit multi-pack
Internal Link: Check out our nail tools guide for more recommendations.
Polygel Tutorial: Step-by-Step Video Style
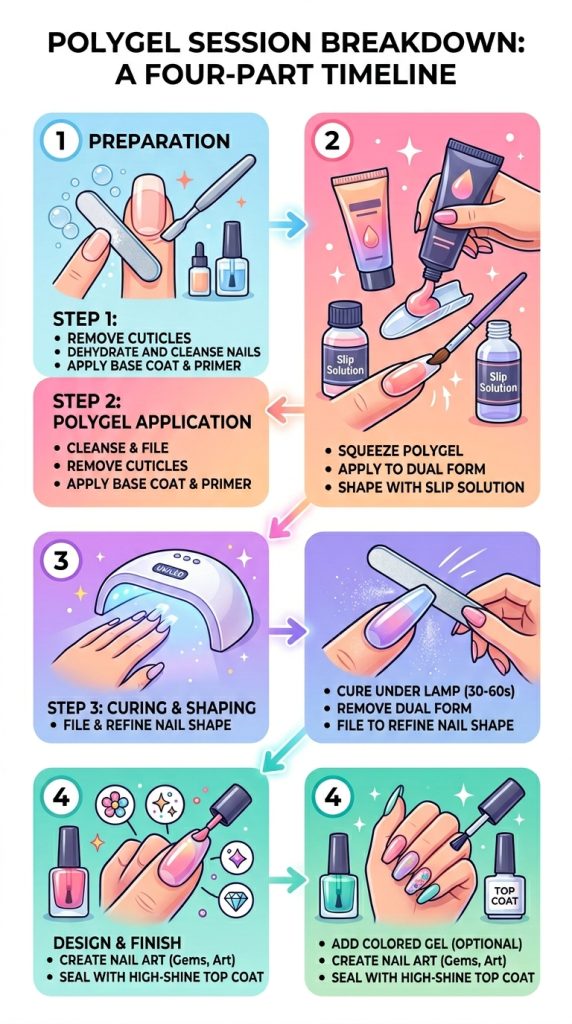
For those who love a polygel tutorial format, here’s how to structure your learning:
Part 1: Prep (10 minutes)
- Remove old polish
- Push cuticles
- Buff nails
- Dehydrate and prime
Part 2: Application (30 minutes)
- Choose dual forms or brush method
- Apply polygel to all nails
- Cure each nail
- Check thickness
Part 3: Shaping (20 minutes)
- File to desired shape
- Smooth surface
- Buff shine
Part 4: Design (20 minutes)
- Add color or art
- Top coat
- Final cure
- Cuticle oil
Pro tip: Film your process for polygel tutorial content—these videos are hugely popular on TikTok and YouTube!
Polygel Nails and Nail Health
Beautiful polygel nails design deserves a healthy foundation. Here’s how to keep your natural nails happy:
During Wear:
- ✅ Keep polygel thin (not bulky)
- ✅ Never lift or pry lifting edges
- ✅ Moisturize cuticles daily
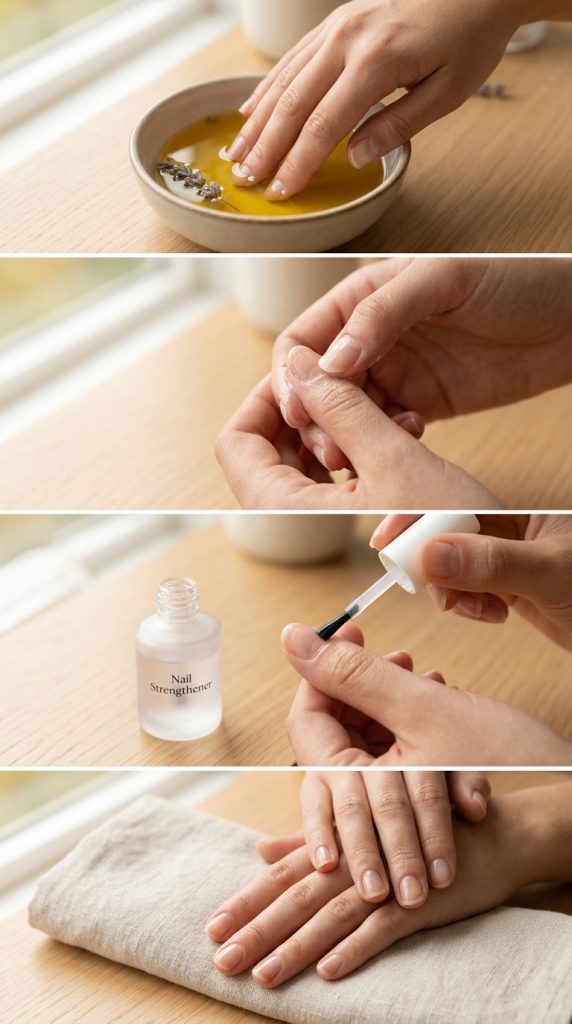
After Removal:
- 🧴 Soak nails in warm olive oil for 5 minutes
- 💆 Gently massage cuticles
- 💅 Apply strengthener if desired
- 🌿 Let nails breathe for a few days
Long-term Health:
- 💧 Hydrate cuticles daily
- 🧤 Wear gloves for cleaning
- ✨ Take breaks between sets
- 💪 Consider builder gel for natural nail strength
Internal Link: Learn more about builder gel for natural nails.
Your Turn: Start Your Polygel Journey!
Here’s what I want you to do:
- Pick a starter kit from the recommendations above
- Watch tutorials (save this guide for reference!)
- Practice on one nail first (don’t pressure yourself)
- Take photos to track your progress
- Share your journey—tag me so I can cheer you on!
Remember: every polygel pro started exactly where you are now. My first set was lumpy and thick, and now I can do full sets in under two hours. You’ve got this!
Key Takeaways
- Polygel nails design combines the best of acrylic and gel
- How to apply polygel nails at home is learnable with practice
- Polygel tutorial style learning helps build skills
- Acrylic powder is different—polygel is gentler and easier
- DIY polygel saves money and gives creative freedom
- How long do polygel nails last? 2-4 weeks with proper care
- Polygel is MORE forgiving than acrylics for beginners
- Proper prep is EVERYTHING for longevity
Frequently Asked Questions
Q: Can I use polygel without a lamp?
A: No! Polygel requires UV or LED lamp to cure. Don’t skip it!
Q: Is polygel easier than acrylic?
A: Yes! No runny liquid, no strong smell, more time to work.
Q: How do I remove polygel nails?
A: File off the top layer, soak in acetone for 15-20 minutes, gently push off.
Q: Can I use polygel on natural nails without tips?
A: Absolutely! It’s great for strengthening natural nails.
Q: What’s the best polygel brand for beginners?
A: Modelones or Beetles starter kits are affordable and come with everything.
Let’s Connect
I’d love to see your polygel nails design creations! Tag me in your photos and share your progress.
What’s your biggest question about polygel? Drop it in the comments below!
This guide was proudly created for the community at What Is Builder Gel – your resource for healthy, beautiful nails.

Skilled content writer with more than five years of experience.