
You know that feeling when you want a manicure that looks effortlessly artistic but not overdone? When you scroll through Pinterest for hours, saving pin after pin, wondering if you can actually pull off those stunning designs at home? I have been there more times than I care to admit.
The truth is, abstract nail art has taken over the nail world for a reason. It offers something that traditional floral or character-based designs don’t—pure creative freedom. No rules. No pressure to make things look “real.” Just lines, shapes, and negative space working together to make your nails look like miniature modern art pieces.
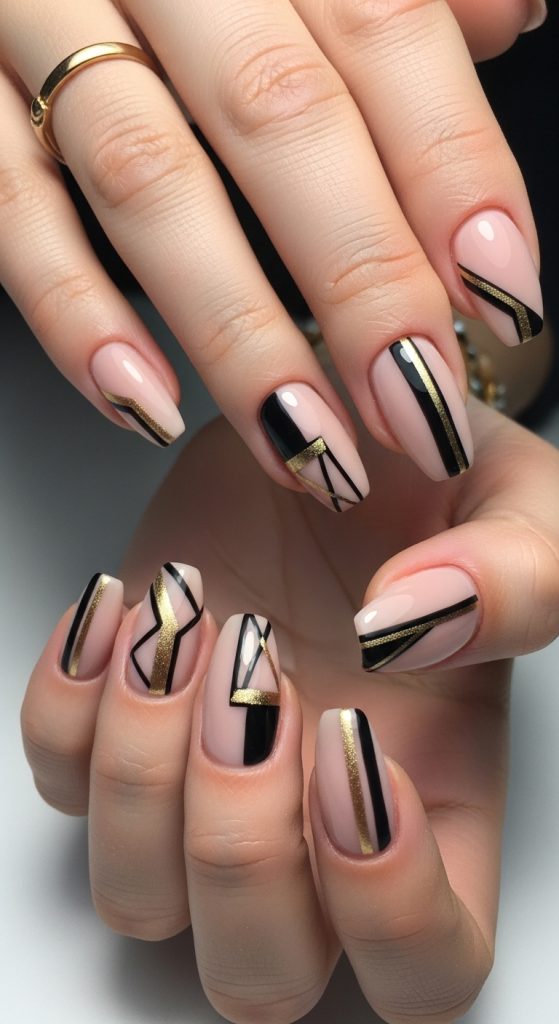
In 2026, we are seeing a massive shift toward intentional minimalism in nail design. According to Pinterest Predicts 2026, searches for “abstract nail art” have increased significantly as more people embrace creative expression that feels personal rather than prescriptive. The “Neo Deco” trend—characterized by clean geometric lines and metallic accents—is driving much of this growth, with line nail designs becoming the go-to choice for fashion-forward individuals who want sophistication without fuss.
In this guide, I am breaking down 15 abstract line nail art designs that range from beginner-friendly to impress-your-friends level. Whether you prefer thin line french tip, black line nail designs, or delicate flower line art, there is something here for every style and skill level.
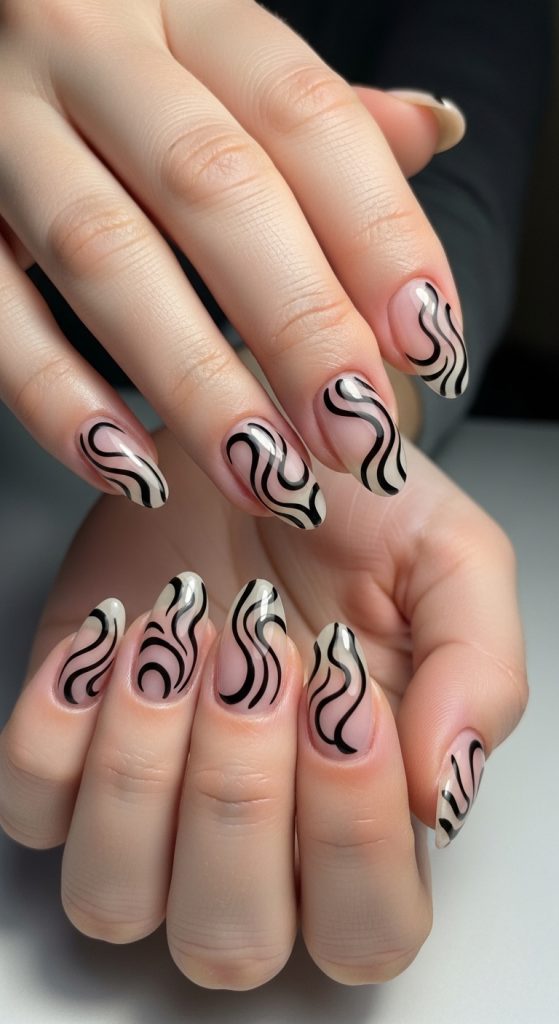
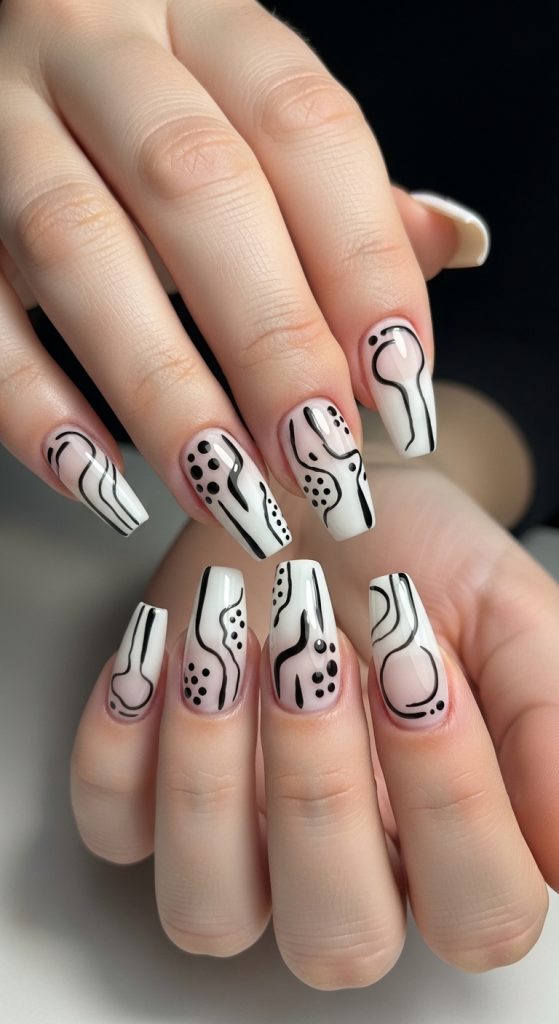
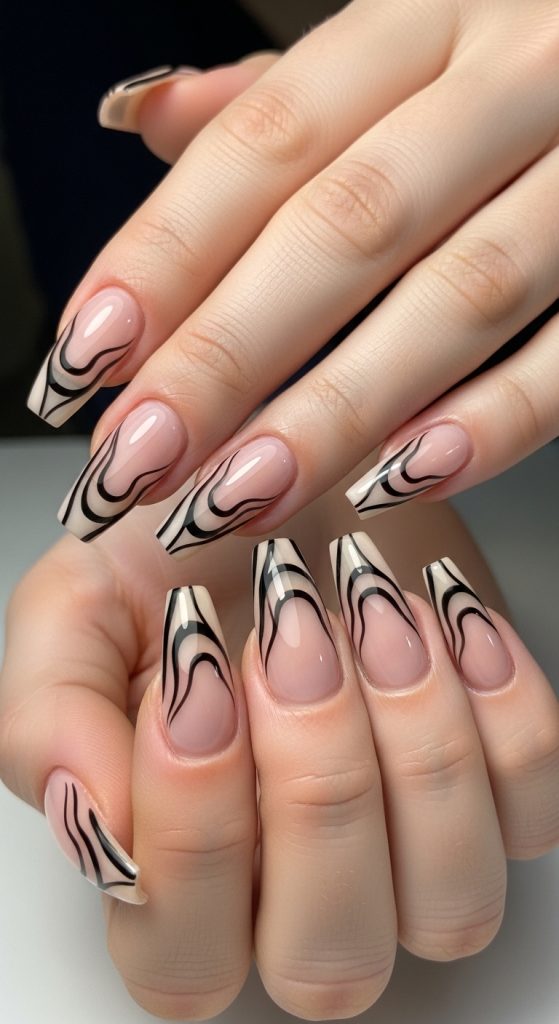
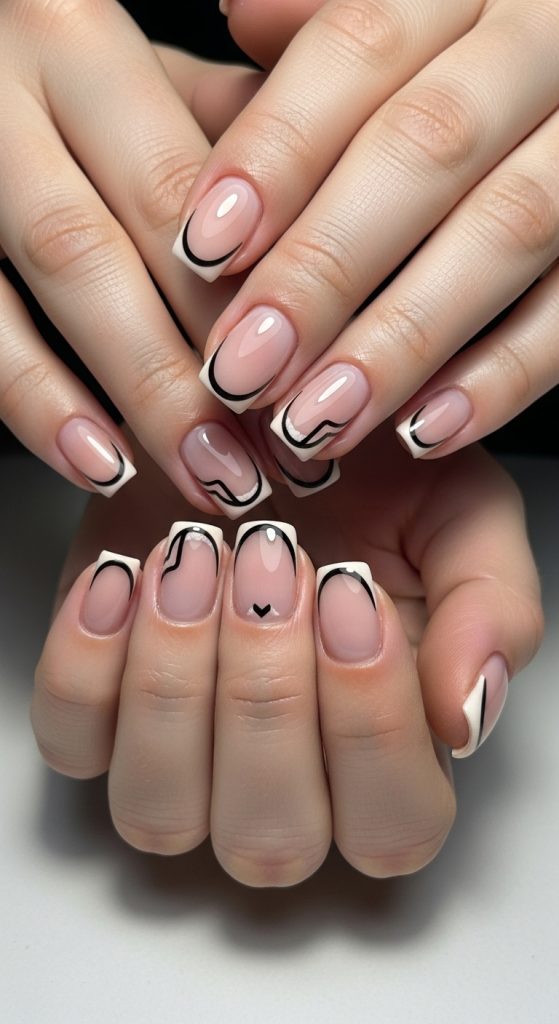
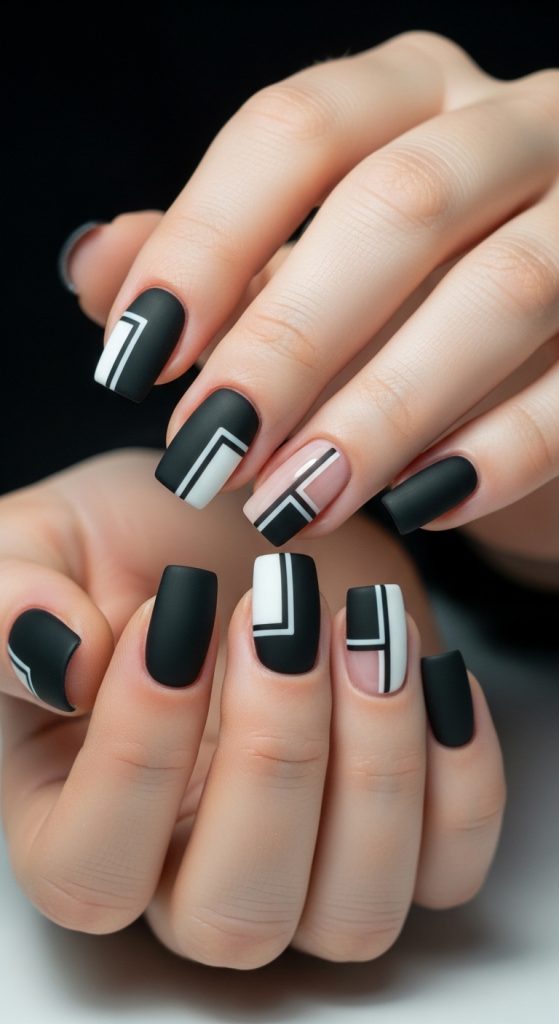
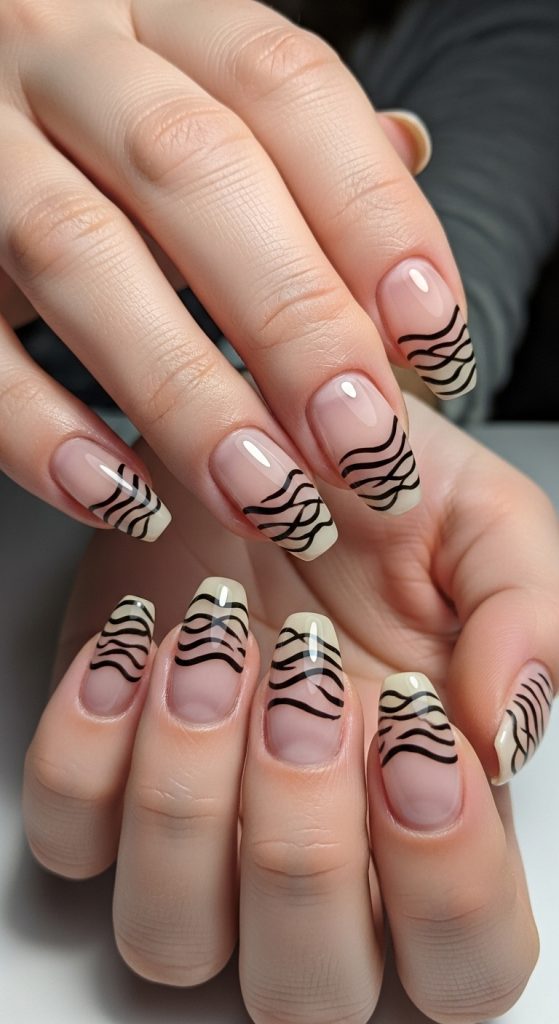
Why Abstract Line Art Is Dominating 2026 Nail Trends
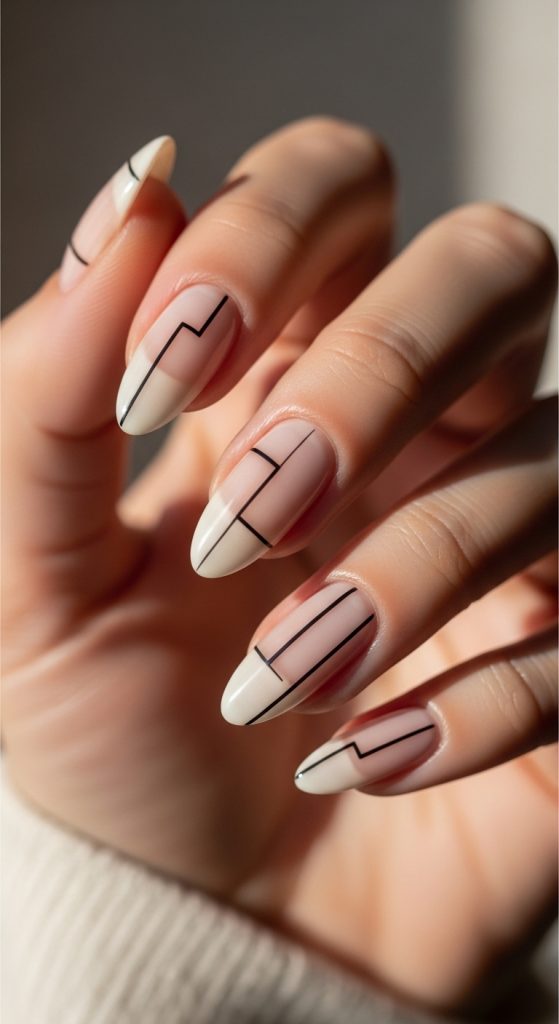
Abstract nail art designs are having a moment—and for good reason. Unlike hyper-realistic designs that require steady hands and professional training, abstract art celebrates imperfection. A wobbly line becomes intentional. A slightly uneven curve adds character. That freedom makes these designs accessible to beginners and endlessly inspiring for professionals.
The Shift Toward Wearable Art
We are moving away from heavily embellished nails toward designs that feel curated rather than crowded. Think about it: when was the last time you saw a minimalist outfit paired with chaotic nails? Exactly. Modern style favors balance, and line art nails deliver that effortlessly.
Celebrity nail artists like Betina Goldstein and Mei Kawajiri have championed this aesthetic, proving that less is often more. Their work frequently features delicate nail line art that feels both spontaneous and meticulously placed. Goldstein, known for her impossibly thin brush strokes, often describes her process as “drawing with intention, not perfection.”
The Role of Negative Space
Negative space—leaving parts of the natural nail bare—has become a defining characteristic of contemporary abstract nail art. It creates visual breathing room and makes even bold lines feel subtle. Designers in 2026 are using negative space not as an afterthought but as a primary design element.
So, what makes these designs so universally appealing? They work on every nail length. They complement any skin tone. And they transition seamlessly from casual weekends to professional settings. That versatility is rare in nail art, and it explains why abstract nail art has become a staple rather than a passing trend.
Essential Tools for Creating Abstract Line Nail Art
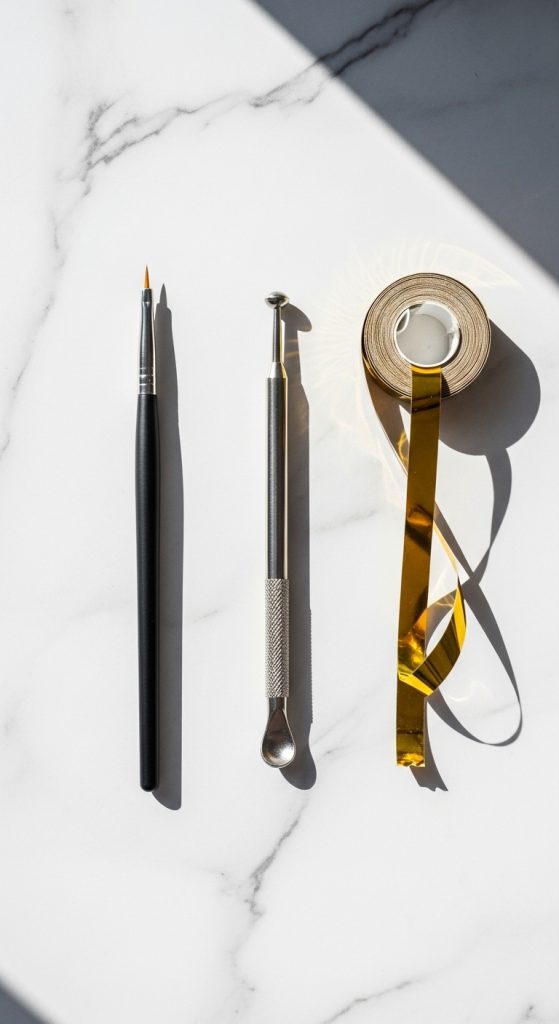
Before diving into the designs, let’s talk tools. Having the right equipment makes the difference between frustration and flow.
Must-Have Tools for Beginners
If you are new to line design nail art, start with these basics:
- Fine liner brush (size #000 or #00)—this is non-negotiable for thin, precise lines
- Dotting tool—perfect for creating intentional dots and curves
- Striping tape—your best friend for achieving clean, straight lines
- High-pigment gel or acrylic paint—for crisp, opaque lines that don’t bleed
- Lint-free wipes and isopropyl alcohol—for cleaning brushes and correcting mistakes
Pro Tip Callout Box
Pro Tip: Invest in a quality liner brush and take care of it. Clean it immediately after use with alcohol, store it with the protective cap, and never let gel polish cure on the bristles. A well-maintained brush can last years. A neglected one will fray within weeks.
Working with Different Mediums
Gel polish offers longevity but requires curing between layers. Acrylic paint allows for more flexibility and easier cleanup but requires a gel top coat to seal it. Many professionals use both—acrylic paint for the detailed line work, gel for the base and top coats.
If you are working with gel, remember: thin lines cure faster. Paint with confidence, cure immediately, and build complexity gradually. Rushing leads to smudges, and smudges lead to frustration.
Design 1: Asymmetrical Single Line Accent
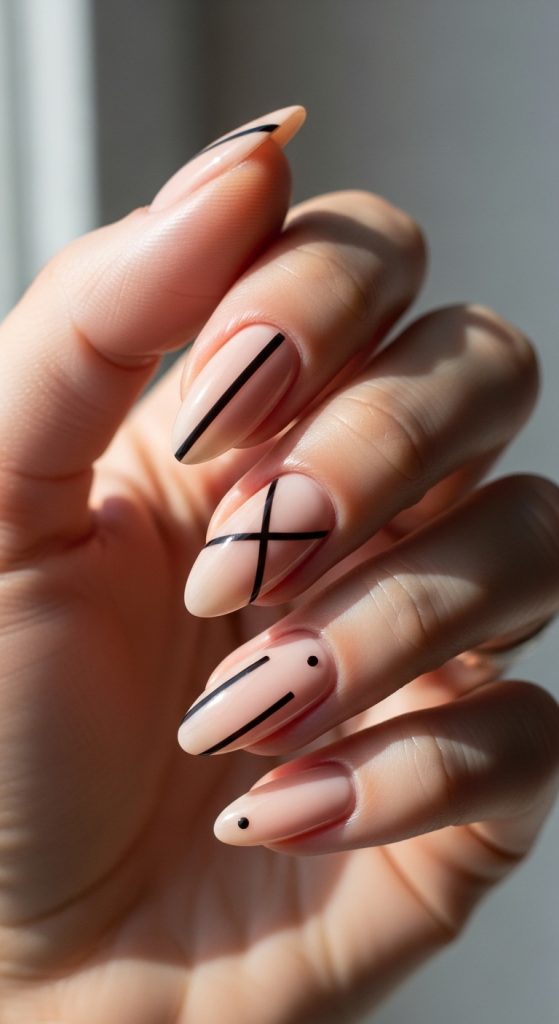
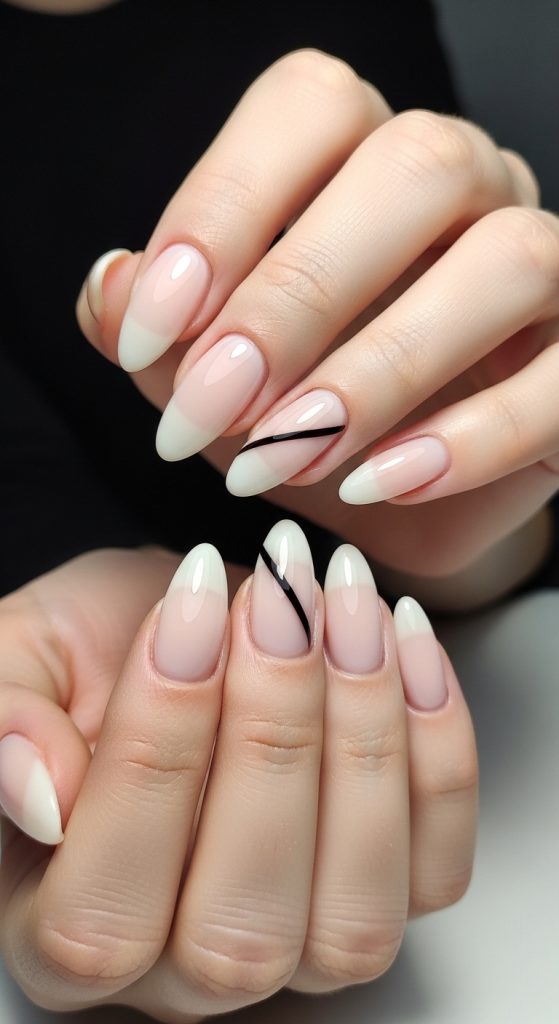
Sometimes the simplest designs make the strongest statements. The asymmetrical single line accent proves that one intentional stroke can transform a basic manicure into something editorial.
This design works beautifully on any nail shape but shines on almond or oval nails where the line can follow the natural curve. The concept is straightforward: paint your nails in a neutral base—sheer pink, milky white, or soft nude—then add a single, bold line on one or two accent nails.
Creating the Look
The line can be vertical, diagonal, or curved along the sidewall. Placement matters. A diagonal line creates movement. A vertical line elongates shorter nails. A curved line adds softness to angular shapes.
For best results, use black line nail designs for high contrast or metallic gold for subtle luxury. The key is to let the line exist on its own without competing elements. Resist the urge to add dots, swirls, or additional strokes. The power of this design is its restraint.
Color Variations
- Black on nude—classic, bold, universally flattering
- White on soft pink—ethereal, bridal, delicate
- Metallic silver on dark base—modern, edgy, unexpected
- Neon on clear—playful, summer-ready, attention-grabbing
Design 2: Geometric Negative Space Grid
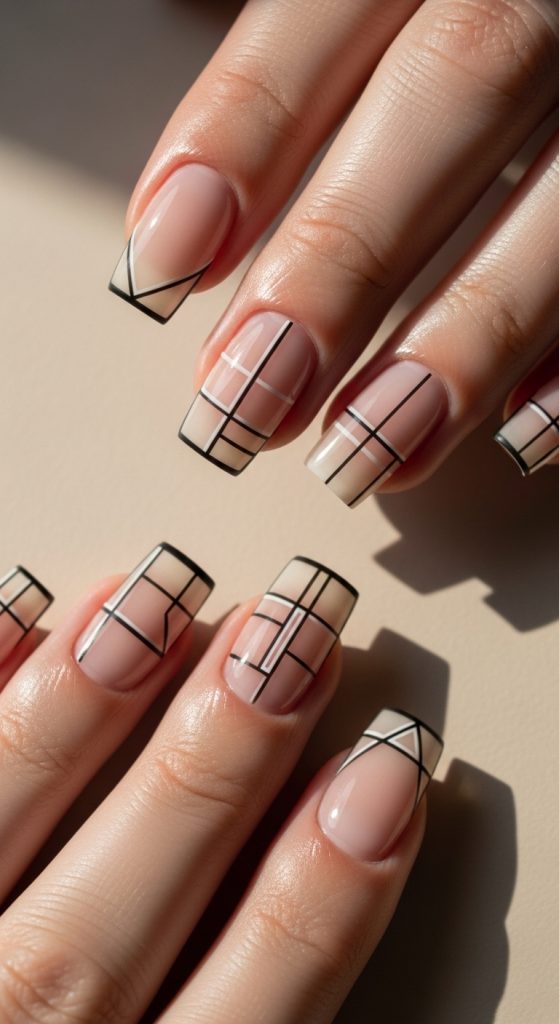
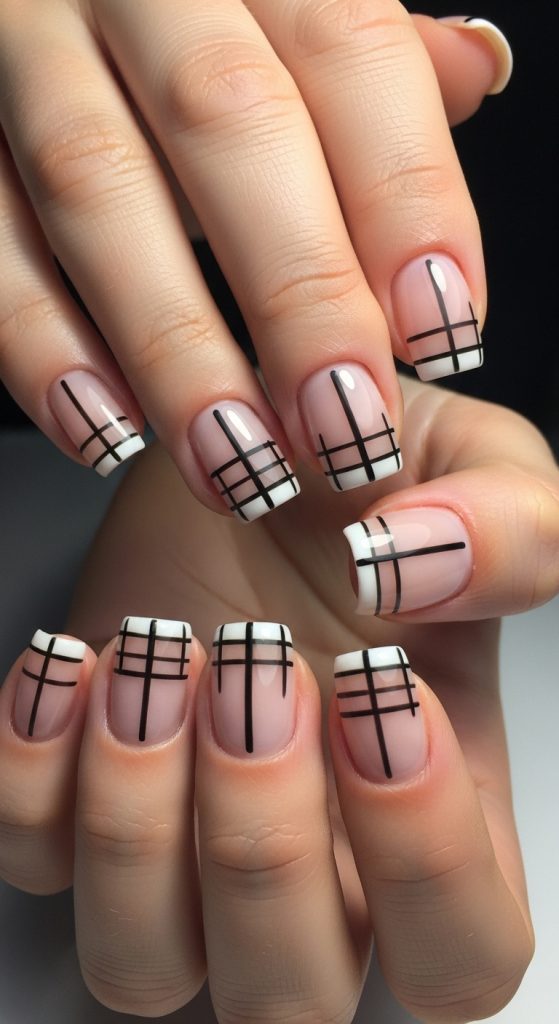
Geometric nail art has seen a resurgence thanks to the Neo Deco trend, and the negative space grid is perhaps its most wearable iteration. This design creates the illusion of structure without covering the entire nail, making it ideal for those who want something architectural but not overwhelming.
Construction Method
Start with a clean, buffed nail—no base color required. Use striping tape to create a grid pattern. You can go for perfect squares, rectangles, or a more randomized asymmetrical grid. Apply your chosen line color (black, white, or metallic work best), cure or dry, then carefully remove the tape.
The result is a design that looks far more complex than it actually is. Because the natural nail serves as the background, you don’t need to worry about color matching or full coverage. This design also wears exceptionally well because chips and growth are less noticeable on negative space.
2026 Twist
This year’s iteration of geometric nail art incorporates subtle metallic accents—think thin gold lines intersecting with black or white grids. The combination of matte negative space with glossy metallic lines creates texture contrast that catches light beautifully.
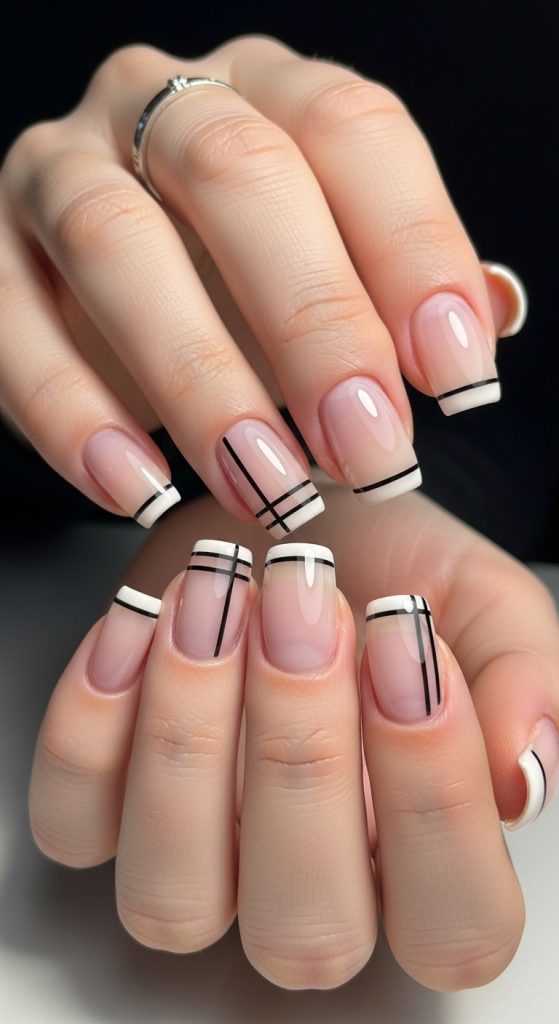
Design 3: Thin Line French Tip Variation
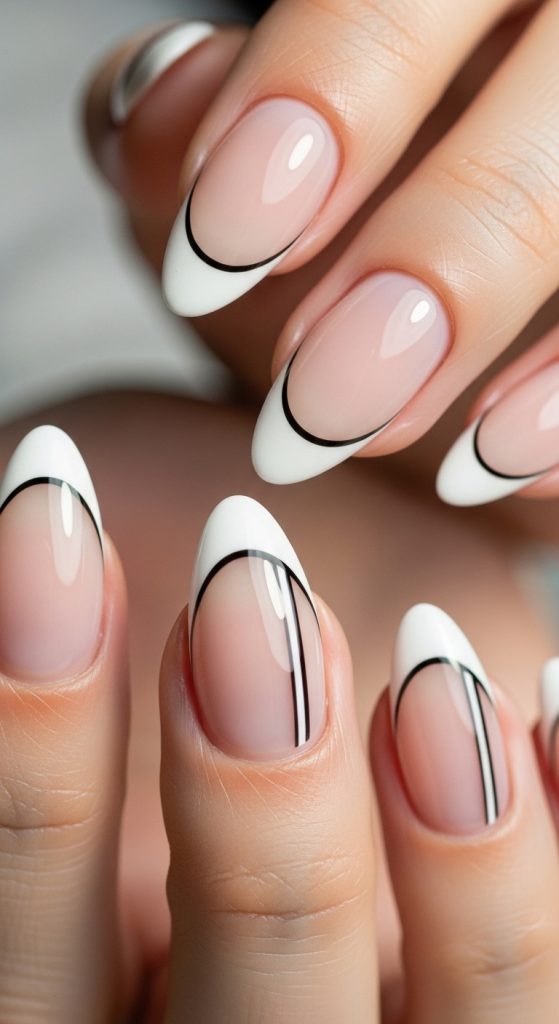
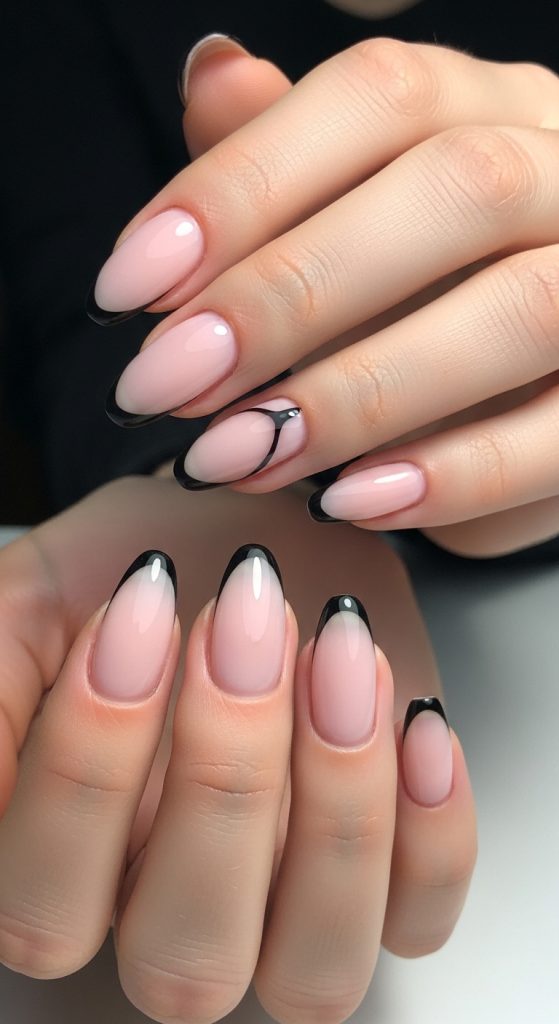
The French manicure has evolved. The thin line french tip represents a modern interpretation that feels fresh while maintaining the classic’s timeless appeal. Instead of a thick, opaque white tip, this version uses a hair-thin line in black, gold, or white placed at the very edge of the nail.
Why This Works
The traditional French tip can feel dated or too formal for everyday wear. The thin line version solves both problems. It reads as intentional but not fussy, modern but not trendy. It elongates the nail bed visually and works on any nail length.
Variations to Try
- Double thin lines—two parallel lines at the tip for added dimension
- Offset line—place the line slightly below the tip for a floating effect
- Metallic line—gold or silver for evening wear
- Colored line—burgundy, navy, or forest green for seasonal variety
This design pairs beautifully with a sheer nude base that mimics the natural nail. If you are doing this at home, the key is patience. Use striping tape or practice freehand with a fine liner brush on a practice tip before committing.
Design 4: Delicate Flower Line Art
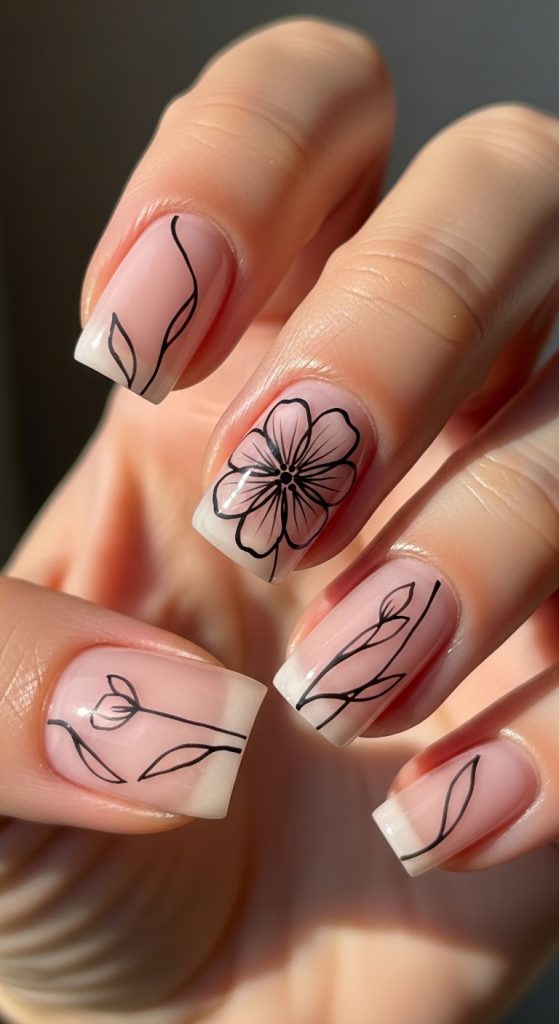
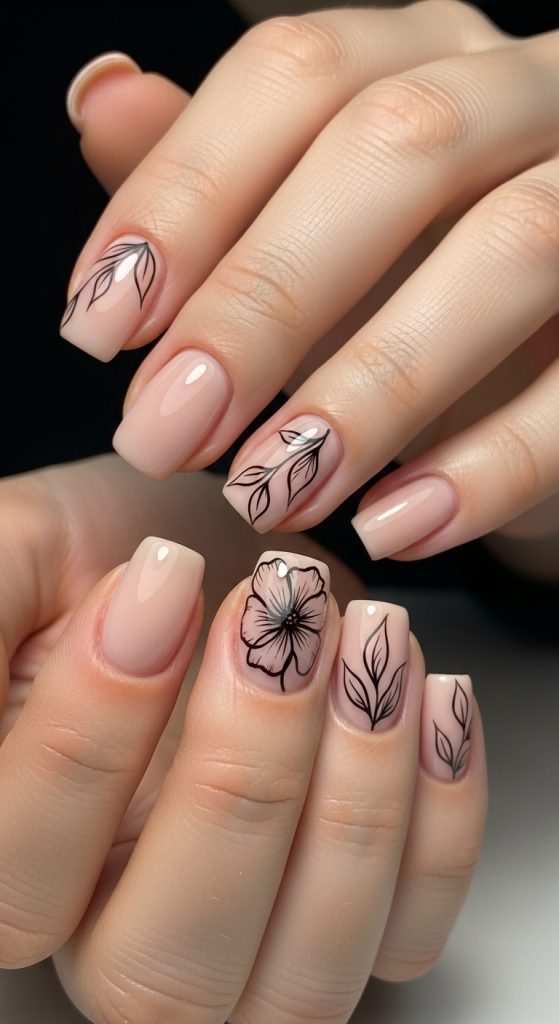
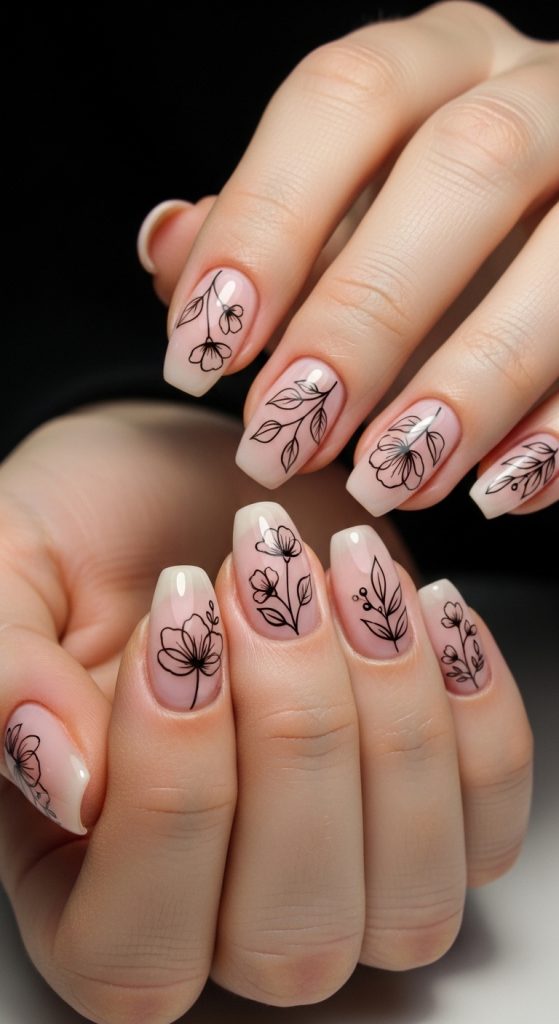
Flower line art brings organic softness to the abstract nail art category. Unlike realistic floral designs that require shading and dimension, flower line art uses simple, continuous strokes to suggest petals, stems, and leaves.
The Continuous Line Method
One technique that yields beautiful results is the continuous line flower—drawing the entire flower in one uninterrupted stroke. Start with a small circle or dot for the center, then loop outward to form petals without lifting the brush. The result feels spontaneous and artistic rather than overly planned.
Flower Accent Nail Placement
For this design, consider using flower accent nail approach: keep most nails simple (single line, negative space, or solid color) and dedicate one or two nails per hand to more detailed floral work. This creates focal points without overwhelming the overall look.
2026 Floral Trends
Pinterest reports that searches for “floral line art” increased significantly over the past year, with particular interest in minimalist botanical designs. The trend leans toward abstract interpretations rather than realistic depictions—think stylized tulips, abstract wildflowers, and single-stroke blossoms in black or muted colors.
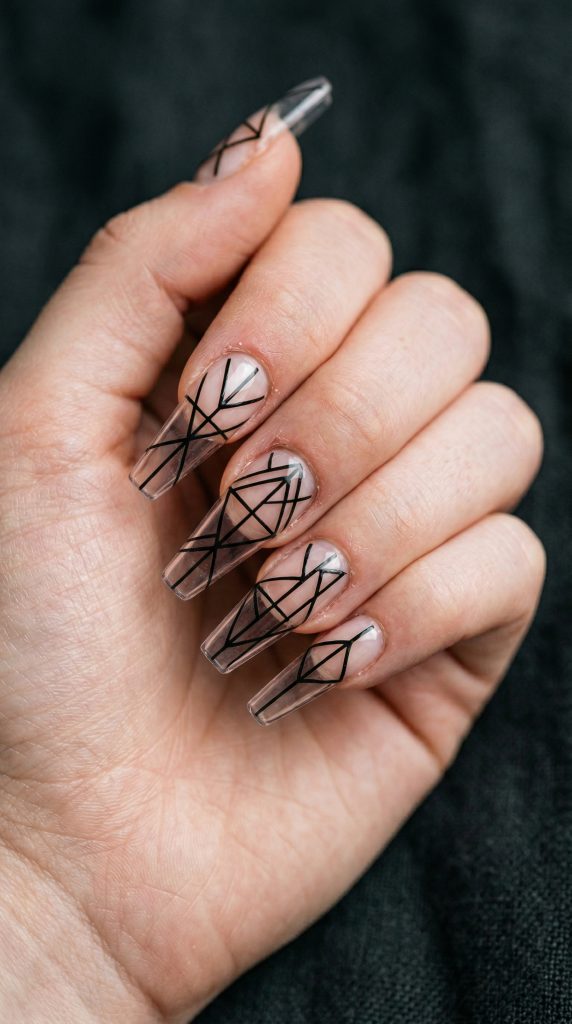
Design 5: Intersecting Lines and Geometric Shapes
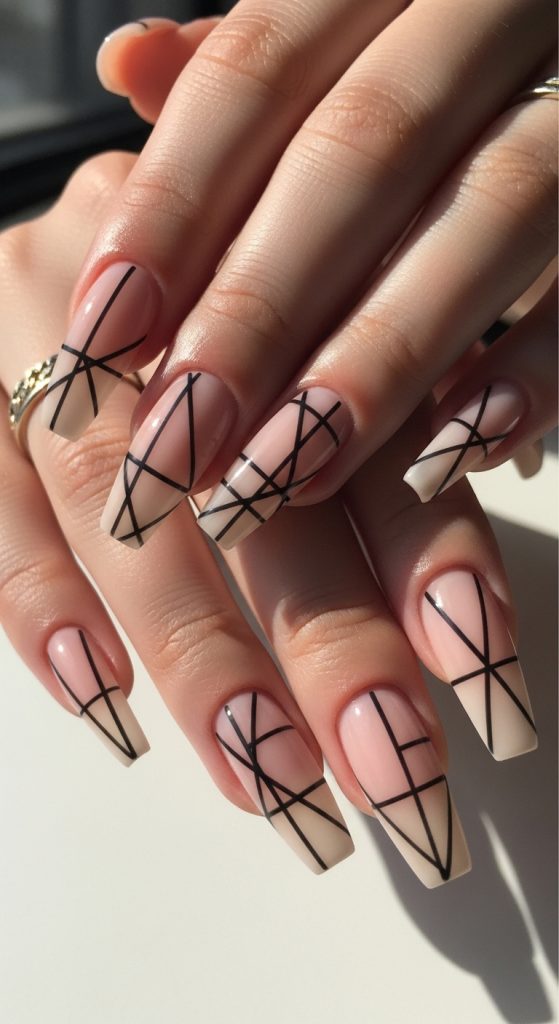
For those ready to move beyond single lines, intersecting line designs offer endless possibilities. The concept is simple: multiple lines cross at different angles, creating triangles, quadrilaterals, and unexpected shapes within the negative space.
Creating Visual Interest
The beauty of intersecting line design nail art lies in its asymmetry. Don’t aim for perfect geometry. Let lines meet at varied points. Some intersections can create small triangles near the cuticle; others can form larger shapes toward the tip. The irregularity keeps the design looking modern and hand-drawn rather than computer-generated.
Color Strategy
Most designers stick to one or two colors for this style. Black lines on a clear or nude base create the strongest graphic impact. If you want to experiment with color, consider:
- Monochromatic lines—varying shades of the same color
- Dual tones—black and metallic gold together
- Accent lines—one line in a bold color among neutral lines
Common Myth Busted
Myth: Abstract line art requires professional training.
Truth: Abstract art by definition embraces imperfection. What looks like a “mistake” to you reads as “intentional texture” to everyone else. The freedom of abstract design means there are no wrong moves—only opportunities to create something unique.
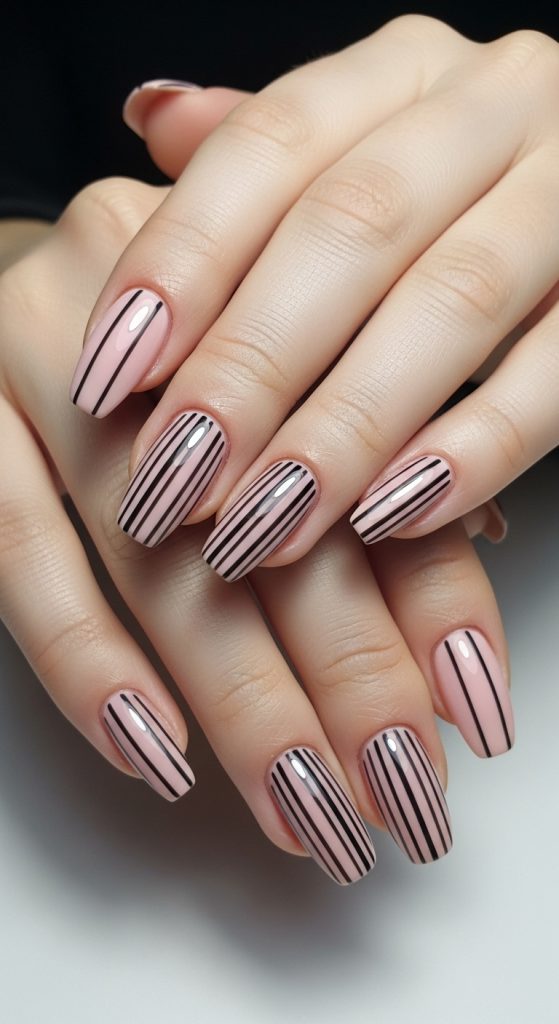
Design 6: Vertical Stripes for Elongation
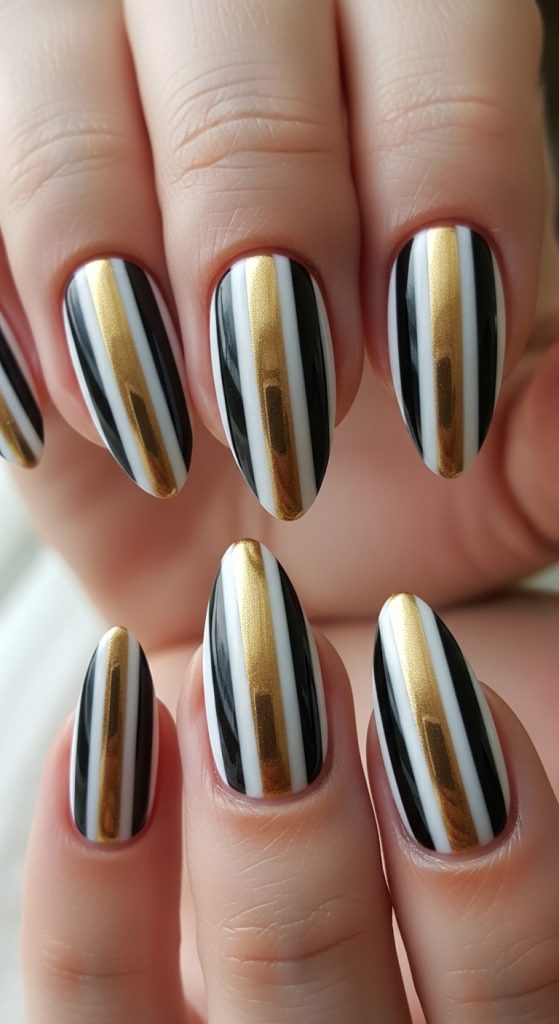
Striped nail art never goes out of style, but the 2026 iteration favors vertical orientation over horizontal. Why? Vertical stripes create the illusion of longer, leaner nail beds—a universally flattering effect.
Width Variation
Instead of uniform stripes, experiment with varying widths. A thick central stripe flanked by two thinner lines creates visual hierarchy. Alternating matte and glossy finishes within the stripes adds another layer of sophistication.
Application Method
Striping tape is your best friend here. Apply base color (or leave negative space), place tape where you want the stripes to appear, paint over with your line color, then carefully remove the tape before curing or drying. For multi-colored stripes, repeat the process with different tape placements.
Color Combinations
- Black and white—graphic, bold, timeless
- Gold and nude—luxurious, subtle, elegant
- Pastel stripes on clear—playful, spring-ready, fresh
- Neon accents—summer vibes, attention-grabbing
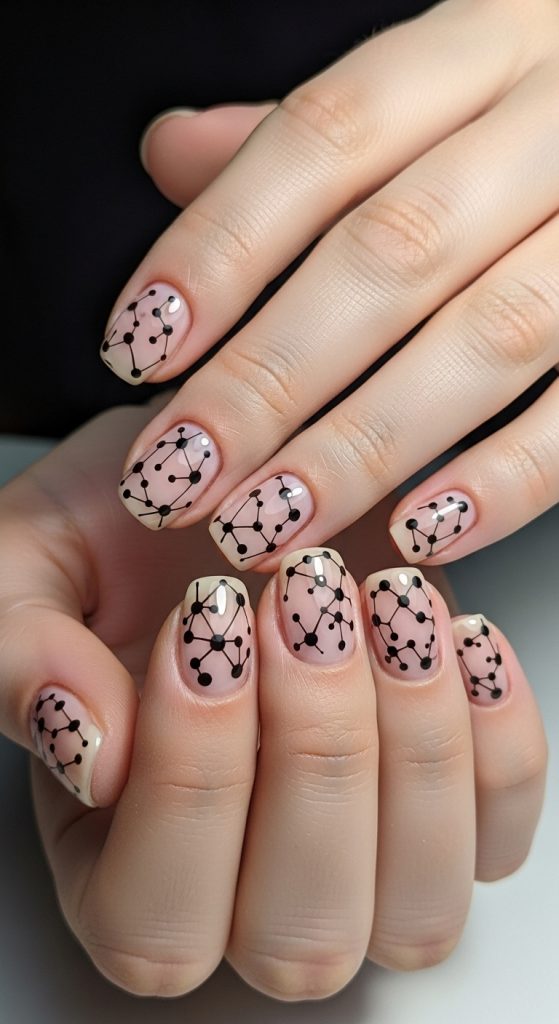
Design 7: Dot-and-Line Connections
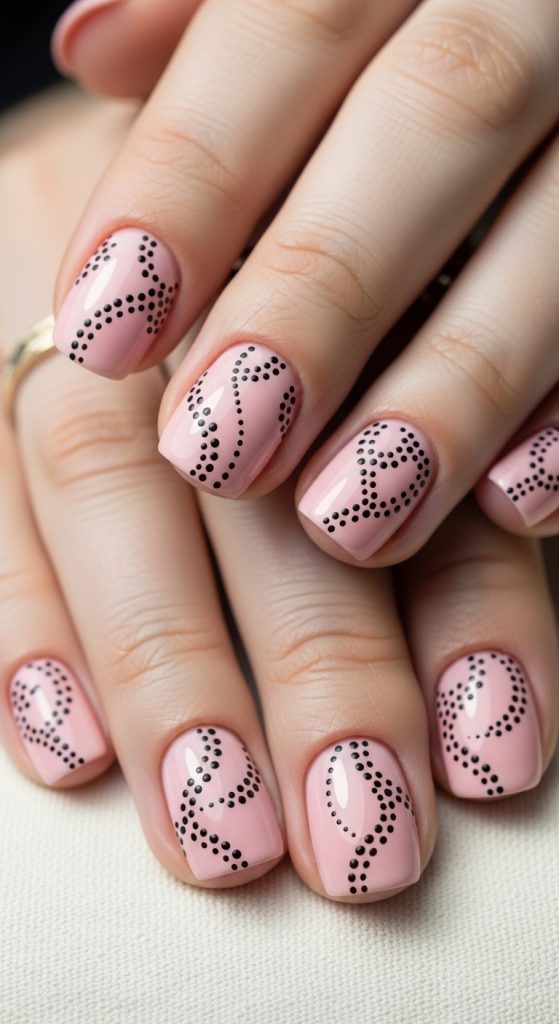
This design combines two fundamental elements—dots and lines—into something that feels both scientific and whimsical. Imagine constellations mapped onto your nails. Small dots serve as anchor points; thin lines connect them in seemingly random but harmonious patterns.
Creating the Pattern
Start by placing three to five dots on the nail using a dotting tool. Don’t arrange them in a perfect line or symmetrical pattern—random placement looks more organic. Then, using a fine liner brush, connect the dots with curved or straight lines. Some dots can connect to multiple others; some can remain unconnected.
Visual Storytelling
This design invites interpretation. Some see constellations. Others see abstract maps. Still others see musical notes. That ambiguity is precisely what makes abstract nail art designs so engaging—they invite viewers to find their own meaning.
Pro Tip Callout Box
Pro Tip: When connecting dots with lines, vary your line weight. Press harder for thicker sections and lighter for delicate passages. This hand-drawn quality adds authenticity and prevents the design from looking too mechanical or computer-generated.
Design 8: Double-Line French Modern
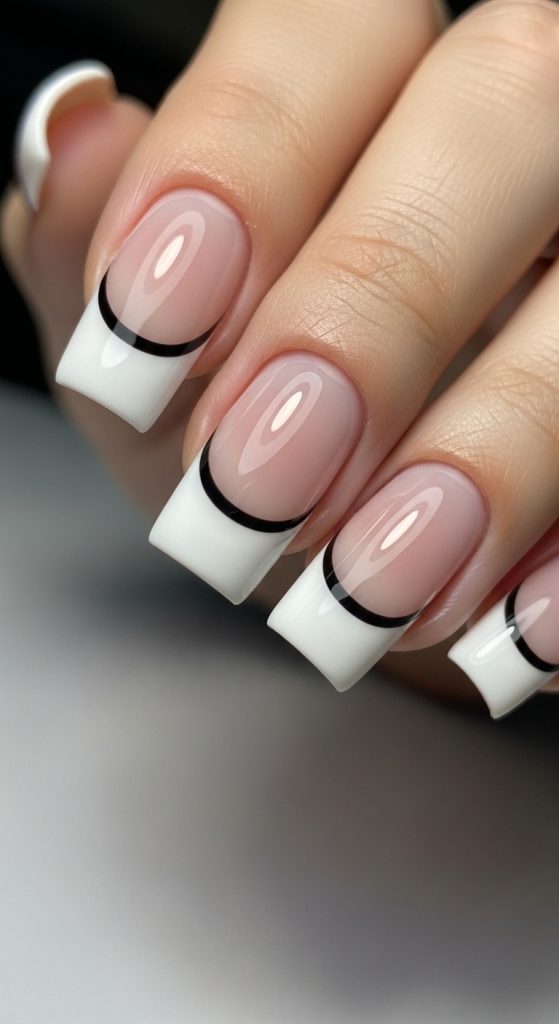
Building on the thin line French concept, the double-line version adds another layer of sophistication. Two parallel lines sit at the tip—either the same color or contrasting shades—creating a stacked effect that reads as both classic and contemporary.
Placement Options
- Traditional placement—both lines at the very tip
- Stacked placement—one line at the tip, one slightly below
- Reverse placement—lines near the cuticle instead of the tip
Color Pairings
The white on white french tip nails variation deserves special mention. Using two shades of white—one bright, one soft—creates subtle contrast that only reveals itself upon close inspection. It is the nail art equivalent of wearing all black: understated but undeniably intentional.
2026 Color Trends
Industry experts note that off-whites, ivories, and cream tones are replacing stark white in French tip applications. These warmer shades complement a wider range of skin tones and create a softer, more natural look that aligns with 2026’s preference for wearable elegance.
Design 9: Asymmetrical Organic Flow
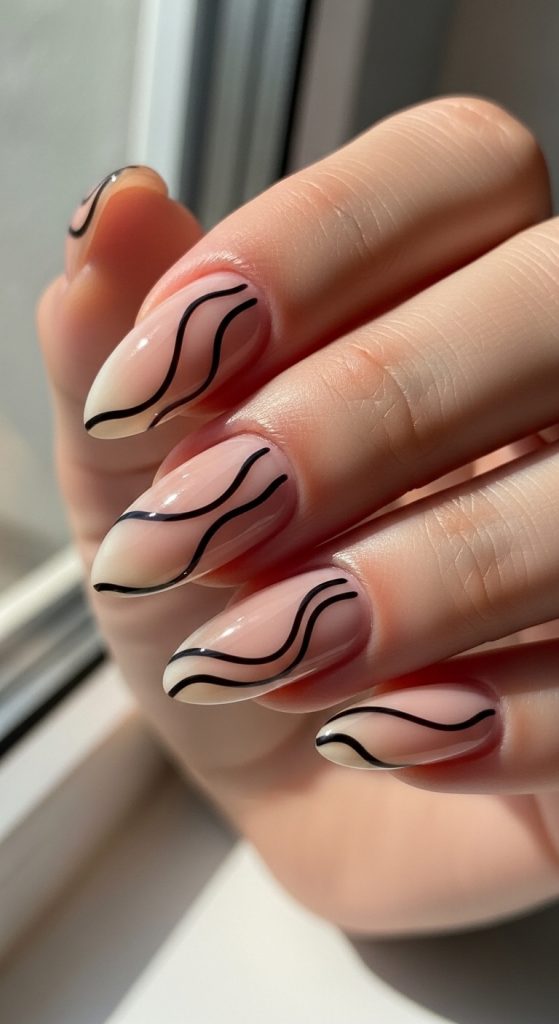
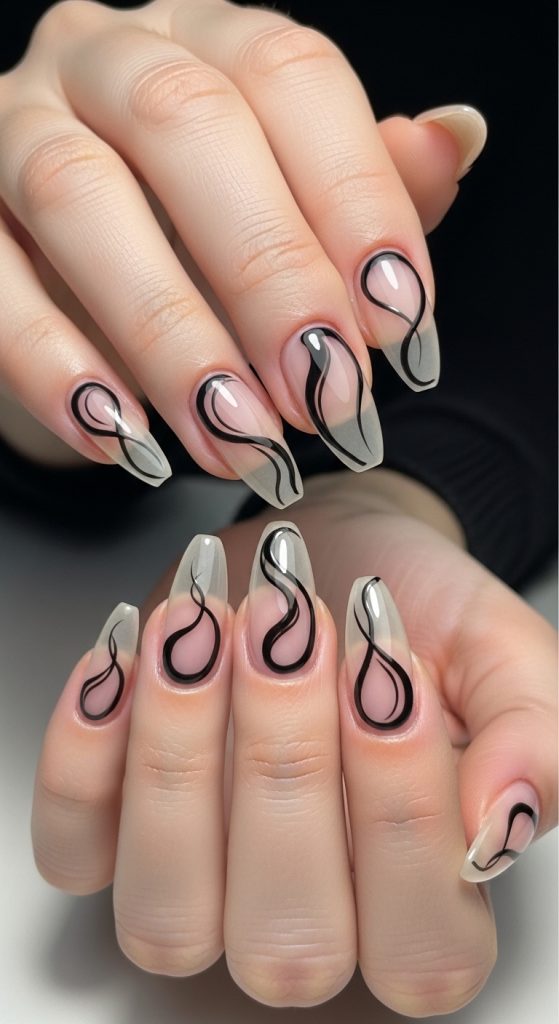
If geometric precision isn’t your style, organic flowing lines offer an alternative. This design embraces curves, loops, and natural movement. Think of a single continuous line that starts near the cuticle and meanders toward the tip, creating loops and curves along the way.
Freehand Freedom
This is one design where freehand application yields better results than tape or stencils. The slight variations in line weight and curve placement add authenticity. If you are nervous about freehand work, practice on a piece of paper first to develop muscle memory.
Flow Direction
Consider the natural movement of your hands. Lines that flow toward the tip feel uplifting. Lines that curve toward the sidewall feel grounding. You can also create designs that appear to continue from one nail to the next, creating a cohesive story across the hand.
Personal Anecdote
I remember the first time I attempted organic flow lines. My hands were shaking, my lines were wobbly, and I almost wiped the whole thing off in frustration. But I let it dry, added a top coat, and something surprising happened: people complimented the “beautiful hand-drawn quality.” That wobble I hated read as intentional texture to everyone else. Now I embrace those small imperfections as proof that a human—not a machine—created the design.
Design 10: Curved Contour Lines
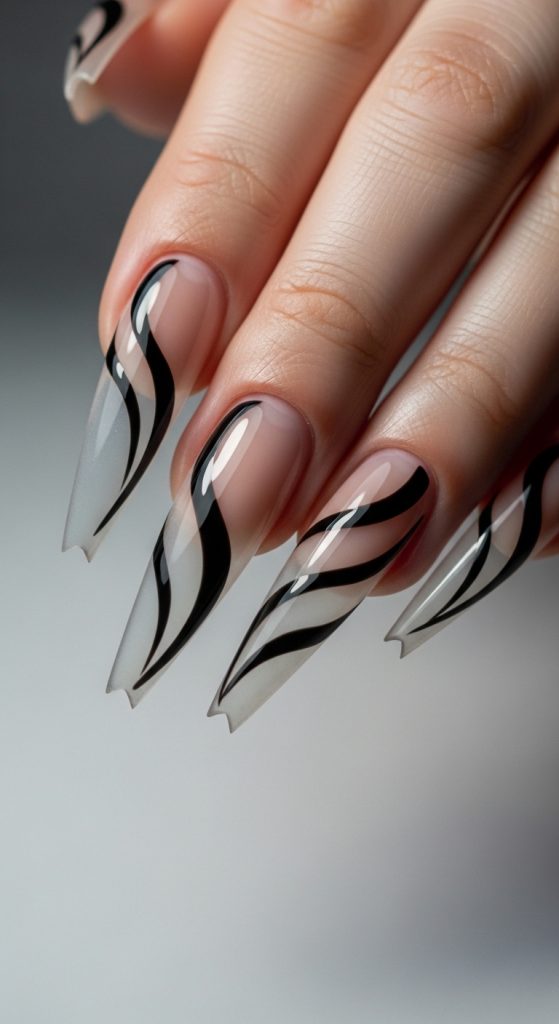
Contour lines follow the natural shape of your nails, creating designs that feel custom-fitted rather than applied. This technique works particularly well on curved nail shapes like almond, oval, and stiletto.
Following the Architecture
Examine your nail shape before you start. Identify the natural curves—the sidewalls, the C-curve, the arch. Place your lines to echo or enhance these natural features. Lines that mirror the cuticle curve create a cohesive look. Lines that follow the sidewall add structure.
Graduated Lines
One advanced technique involves placing multiple parallel contour lines at graduated intervals—closer together near the cuticle, spreading out toward the tip. This creates the illusion of movement and draws the eye along the length of the nail.
Color Considerations
Black lines on a clear base offer the strongest architectural effect. Metallic lines on a nude base feel softer but equally intentional. For a subtle approach, use a glossy top coat over a matte base, creating lines defined by texture rather than color.
Design 11: Cuticle-Edge Definition
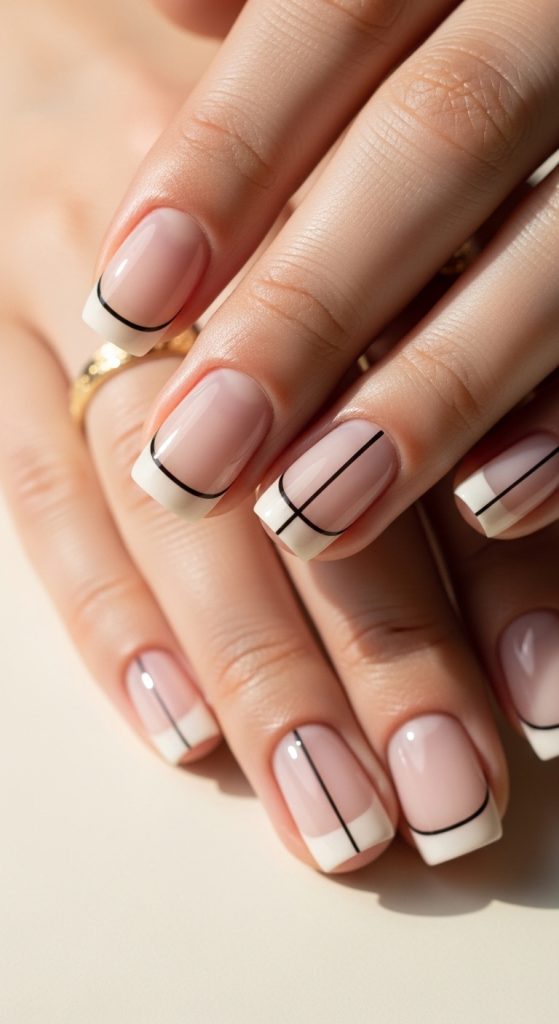
Placing line art at the cuticle rather than the tip creates unexpected visual interest. This approach draws attention to the nail bed and can make shorter nails appear more intentional and styled.
Design Possibilities
- Single arc—a curved line that follows the cuticle shape
- V-shape—two lines meeting at the center of the cuticle
- Geometric cutout—lines creating a shape that frames the cuticle
Practical Benefits
Cuticle-edge designs wear exceptionally well because growth is less noticeable. If your nails grow quickly, these designs can extend the life of your manicure by weeks compared to tip-focused designs.
2026 Micro-Trend
Nail artists report increased interest in what they call “floating cuticle designs”—line art that hovers just above the cuticle rather than touching it. This creates the illusion of a floating element and adds unexpected sophistication.
Design 12: Mixed Media Texture Play
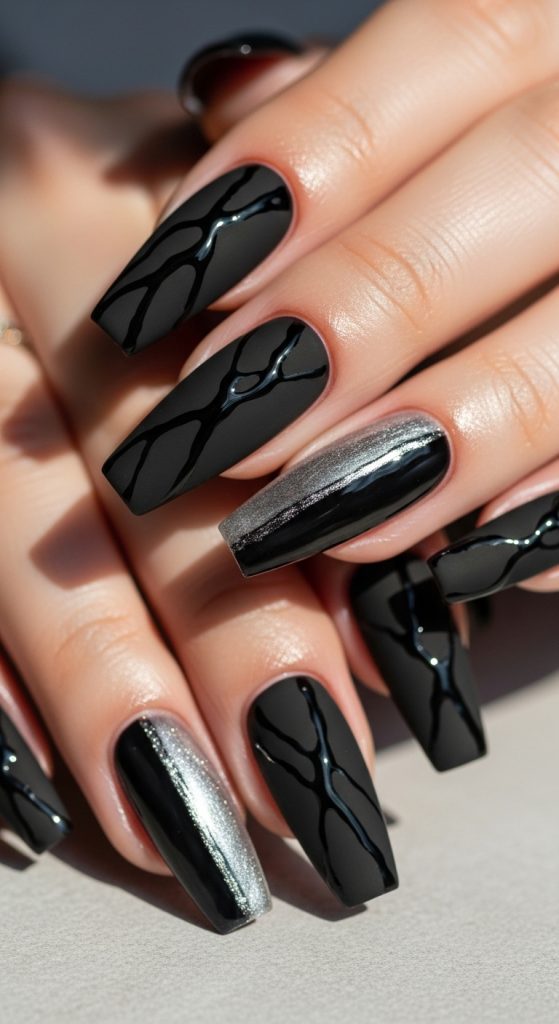
Abstract nail art in 2026 isn’t just about lines—it is about how those lines interact with texture. Combining matte and glossy finishes within a single design adds depth without adding color or complexity.
Matte vs. Glossy
Start with a matte base color—nude, black, or a muted tone work best. Apply your line art using a glossy top coat or glossy gel. The result is a design that reveals itself through light reflection rather than color contrast. It is subtle, sophisticated, and endlessly elegant.
Metallic Accents
Adding metallic elements—thin gold lines, silver dots, chrome accents—elevates basic line art nails into statement pieces. The 2026 Neo Deco trend embraces these metallic touches, using them sparingly for maximum impact.
Application Order
For mixed media designs, the order matters. Apply and cure your matte base. Apply your glossy lines using a fine liner brush. Cure. If adding metallic accents, apply them last, ensuring they are fully sealed under a final top coat.
Design 13: Minimalist Floral Line Art
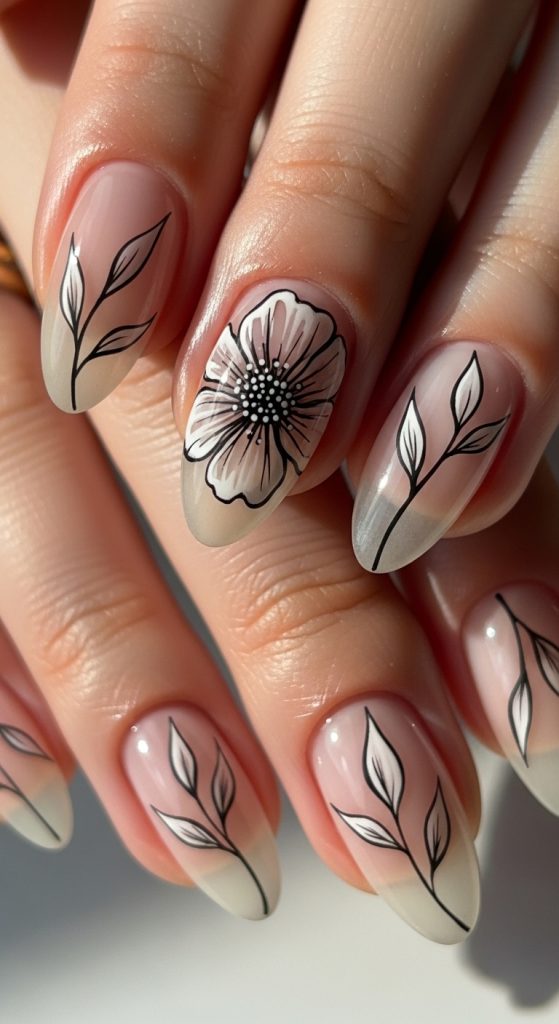
Flower line art reaches peak elegance when approached with restraint. Rather than filling the nail, let botanical elements breathe. A single stem with two leaves. One unfurling blossom. Three minimalist buds clustered near the sidewall.
Botanical Inspiration
The most successful minimalist floral designs take inspiration from botanical illustrations rather than garden photographs. Think simple, clean lines, negative space, and an emphasis on silhouette over detail.
Flower Accent Nail Strategy
Consider the flower accent nail approach: four nails feature simple lines or solid color; one nail per hand features a more detailed floral illustration. This creates hierarchy and allows each design element to shine without competing.
Seasonal Variations
- Spring—cherry blossoms, tulips, delicate stems
- Summer—wildflowers, abstract petals, sun motifs
- Fall—single leaves, dried botanicals, curved stems
- Winter—bare branches, evergreen sprigs, geometric florals
Design 14: Scalloped Edge Detailing
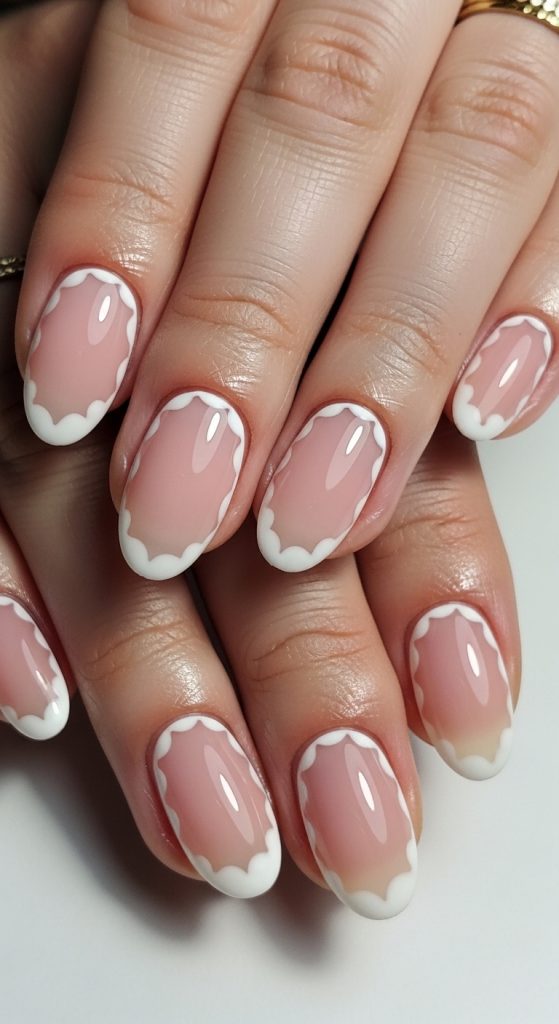
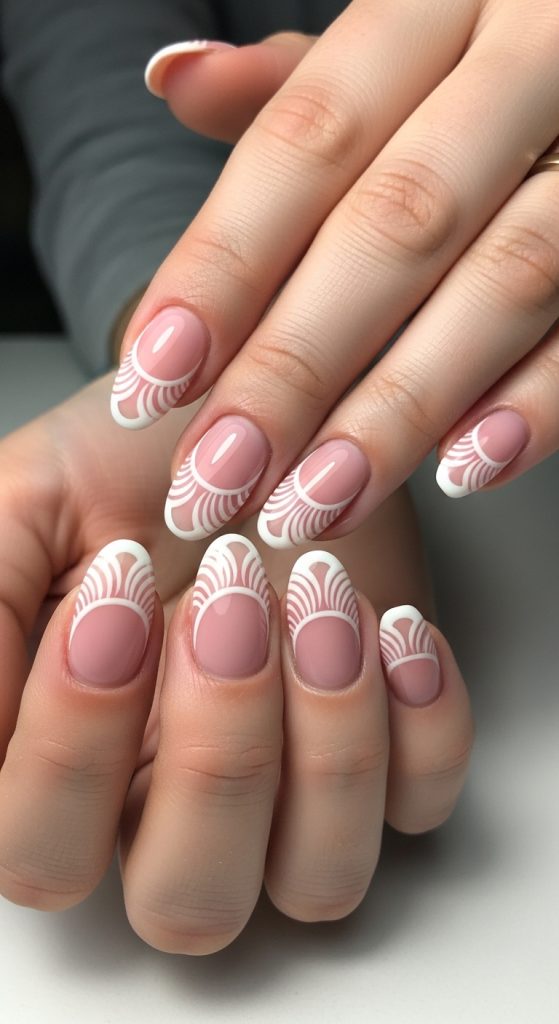
Scalloped lines—curved, wave-like patterns—offer a softer alternative to straight lines. This design works beautifully at the tip, cuticle, or as a central band across the nail.
Creating the Scallop
Use a dotting tool to create a series of small, overlapping circles along your intended line. Connect them with a fine liner brush to form a continuous scalloped edge. The result is delicate, romantic, and surprisingly simple to execute.
Placement Variations
- Tip scallops—reminiscent of vintage lace, perfect for bridal
- Cuticle scallops—frames the nail bed, adds soft definition
- Central band—creates a focal point across the nail
Color Pairings
White scallops on a soft pink base create a timeless, feminine look. Black scallops on nude feel unexpectedly modern. Metallic scallops add luxury without overwhelming.
Design 15: Continuous Line Across All Nails
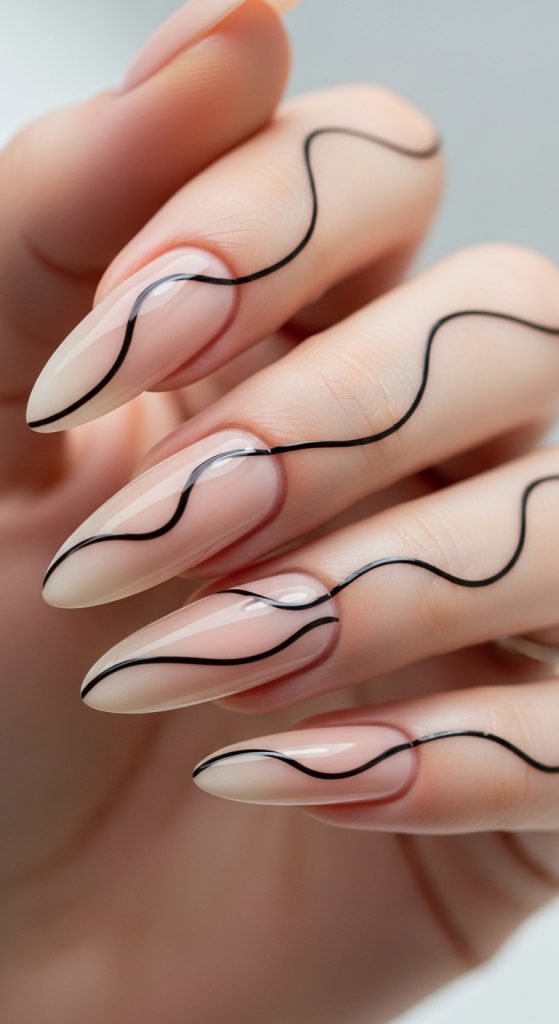
This advanced design treats all five nails as one canvas. A single continuous line flows from the pinky to the thumb, creating a cohesive composition that draws the eye across the entire hand.
Planning the Composition
Before you begin, sketch your intended line on paper. Consider how it will travel across each nail, where it will create loops or curves, and where it will pause between nails. The most successful designs create visual interest on each nail while maintaining continuity across the set.
Execution Tips
Work on all nails simultaneously, allowing the line to flow naturally from one to the next. Don’t worry if the line isn’t perfectly smooth between nails—the connection is conceptual rather than literal.
Why This Stands Out
This design consistently generates the most engagement on Pinterest. It is unexpected, editorial, and photographically interesting—qualities that make it ideal for social media sharing. If you are looking for a design that will earn compliments, this is it.
Frequently Asked Questions About Abstract Line Nail Art
How do I keep my lines straight?
Use striping tape as a guide. Place it where you want your line, paint over it, remove while the polish is still wet (for regular polish) or before curing (for gel). For freehand lines, anchor your painting hand against a stable surface and work in short, confident strokes.
What if I make a mistake?
Keep a fine liner brush dipped in isopropyl alcohol nearby. For gel, wipe away mistakes before curing. For regular polish, a cotton swab with remover can clean edges. Remember that abstract art embraces imperfection—small wobbles add character.
How long do these designs last?
With proper application and a quality top coat, abstract line designs last as long as any manicure—typically 2-3 weeks for gel, 5-7 days for regular polish. Negative space designs often wear better because growth and minor chips are less visible.
Can I do these on short nails?
Absolutely. Many of these designs work better on short nails than long ones. Vertical stripes elongate. Cuticle-edge designs draw attention upward. Negative space creates the illusion of length. Short nails can be a canvas for some of the most elegant abstract work.
Conclusion: Your Abstract Nail Art Journey Starts Here
Abstract line nail art represents something bigger than a trend. It is permission to create without rules. To embrace imperfection. To make your nails an extension of your personal aesthetic rather than a copy of someone else’s.
Whether you are drawn to thin line french tip elegance, black line nail designs boldness, or the organic softness of flower line art, the fifteen designs in this guide offer starting points for your own creative exploration. Start with the designs that speak to you. Practice on one nail at a time. Celebrate small victories.
The best abstract nail art—the kind that stops people mid-conversation to ask where you got them done—doesn’t come from perfection. It comes from intention. From the confidence to put line to nail and trust your eye. From the willingness to experiment, make mistakes, and try again.
So, which of these designs will you try first? Will you go bold with intersecting geometric lines or keep it subtle with a single asymmetrical stripe? Drop a comment or save this guide to your favorite Pinterest board—and when you create your own abstract line nail art, share it. The community wants to see what you make.
Ready for More Nail Inspiration?
If you loved exploring abstract line nail art, you might also enjoy diving into builder gel techniques for creating the perfect canvas. Head over to whatisbuildergel.com for expert guides on strengthening and extending your natural nails—the ideal foundation for any nail art adventure.
